A Step-by-Step Guide on How to Install Window Screen Without Frame for Perfect Ventilation
Ever thought about getting more fresh air into your home without the bulk of window frames? Installing a frameless window screen might just be your answer. It's like having a secret weapon for better airflow and a sleek look. Plus, it's not going to break the bank. This guide will walk you through the whole process of setting up a window screen without a frame, step by step. Whether you're a DIY newbie or a seasoned pro, you'll find these tips handy. Let's get started on making your space breezy and stylish.
Key Takeaways
- Frameless window screens boost airflow and look modern.
- Choosing the right materials makes installation easier.
- Proper prep of your window ensures the screen sticks well.
- Following the steps carefully helps avoid common issues.
- Regular maintenance keeps your screen in top shape.
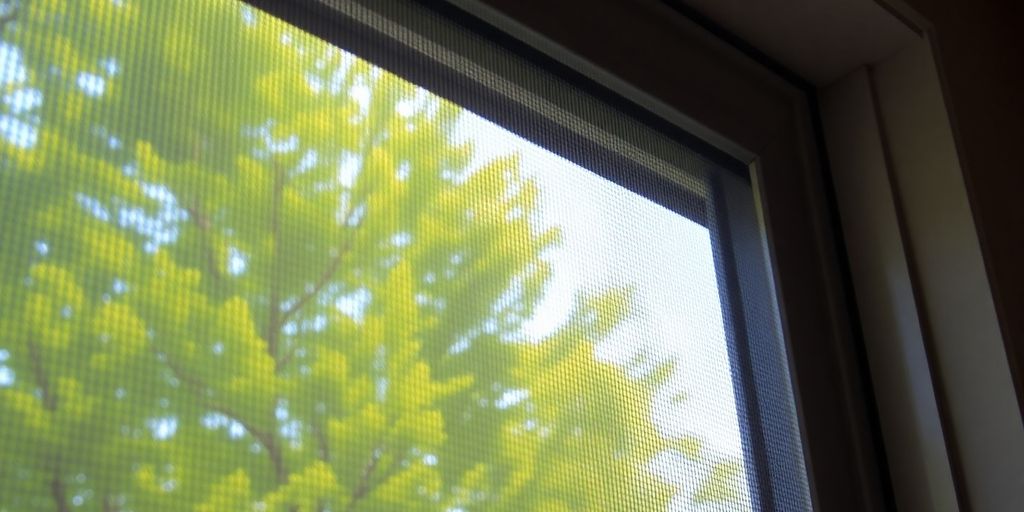
Understanding the Benefits of Frameless Window Screens

Enhanced Ventilation and Airflow
Frameless window screens are all about letting the breeze in without the fuss of a bulky frame. They offer superior airflow, making your living space feel fresh and airy. Without the frame, there's nothing to block or restrict the natural flow of air, which is perfect for those stuffy summer days. Plus, you can enjoy the sounds and scents of nature without any barriers.
Cost-Effective Solution for Homes
If you're watching your budget, these screens are a smart choice. They skip the frame, which means fewer materials and less cost. It's a win-win: you save money and still get a great product. Installation is usually simpler too, so you might not even need to hire a pro, saving you even more.
Aesthetic Appeal and Modern Look
Frameless screens bring a sleek, modern vibe to any home. They blend seamlessly with your windows, offering a minimalist look that's hard to beat. These screens don't just function well—they look good doing it. Whether your style is contemporary or classic, frameless screens can fit right in, enhancing your home's overall appeal.
With frameless window screens, you get the perfect mix of function and style, making them a top choice for modern homeowners.
For more on versatile window solutions, check out the WRS 1-1/2" x 3" Surface Mounted Guide, a handy component for various window types.
Choosing the Right Materials for Your Window Screen
Selecting the Best Screen Mesh Material
Picking the right screen mesh is like choosing the perfect outfit for your window. Fiberglass mesh is super popular because it's durable and easy to work with. Aluminum mesh is another option, offering strength but can be a bit tricky to handle. If you're looking for something fancy, polyester mesh with UV protection might be your thing. Think about what you need: Do you want to keep bugs out? Let more light in? Or maybe both?
Tools Required for Installation
Before you dive into the installation, gather your tools. You'll need:
- A measuring tape for accuracy
- Scissors or a utility knife for cutting
- A spline roller to press the screen into place
- Adhesive strips or magnetic tape, depending on your preference
Having these tools on hand will make the process smoother and less frustrating.
Measuring Your Window Accurately
Getting the measurements right is crucial. Start by measuring the width and height of the window opening. Write these down, and then measure again just to be sure. It's better to double-check now than to find out your screen doesn't fit later. If you're using The WRS 1-1/2" x 3" Surface Mounted Guide, make sure to factor it into your measurements.
Taking the time to measure accurately will save you a lot of headaches down the road. A well-fitted screen not only looks good but also functions effectively.
Preparing Your Window for Screen Installation
Cleaning the Window Area Thoroughly
Before you get started with installing your frameless window screen, it's important to clean the window area well. Dust, dirt, and grime can interfere with the adhesive that holds the screen in place. Use a gentle cleaner and a soft cloth to wipe down the window frame and the glass. Make sure everything is dry before moving on to the next step.
Removing Any Existing Screens or Frames
If there's an old screen or frame already in place, you'll need to take it down. This might seem obvious, but it's easy to overlook. Be careful not to damage the window itself. Use a screwdriver or a similar tool to help with the removal if necessary. Once it's out, check the area for any leftover bits or pieces that need cleaning up.
Ensuring a Smooth Surface for Adhesion
To get the best results, the surface where you'll attach the screen needs to be smooth. Rough patches or uneven spots can cause problems later on. Sand down any rough areas gently. If there are holes or cracks, consider filling them in with a suitable filler. A smooth surface helps the adhesive strips stick better, ensuring your screen stays put.
Taking the time to prepare your window properly can save you a lot of hassle in the long run. A clean, smooth surface ensures that your frameless screen will fit snugly and stay in place, providing great ventilation without any fuss.
Step-by-Step Installation Process for Frameless Screens

Cutting the Screen Mesh to Size
First things first, measure your window dimensions carefully. You don't want to end up with a screen that's too small or too big. Cut the screen mesh slightly larger than the window opening to allow for adjustments. Use a sharp utility knife or scissors for a clean cut. Remember, it's always easier to trim down than to add more.
Applying Adhesive Strips to the Window
Next up, grab those adhesive strips. These are key for holding your screen in place. Clean the window frame thoroughly, removing any dust or grime, so the adhesive sticks well. Peel off the backing and press the strips firmly along the edges of the window. Make sure they're straight and aligned properly.
Securing the Screen Mesh in Place
Now comes the fun part—attaching the screen. Position the mesh over the window, pressing it gently onto the adhesive strips. Start from the top and work your way down, smoothing out any wrinkles or bubbles as you go. Use a roller or your hand to ensure the screen is snug and secure.
Installing a frameless window screen might seem tricky at first, but with patience and the right tools, you'll have it done in no time.
And there you have it! Your window is now ready to provide that perfect ventilation without compromising on style or functionality. If you're looking to enhance your window's performance further, consider checking out the White PGT Face Guide, which offers additional benefits for various window styles.
Tips for Maintaining Your Frameless Window Screen
Regular Cleaning and Maintenance
Keeping your frameless window screen clean is pretty straightforward. Start by gently dusting off any loose dirt or debris with a soft brush or cloth. For a deeper clean, you might want to use a mild soap mixed with water. Remember to avoid harsh chemicals as they can damage the screen material. Rinse it thoroughly and let it air dry. Regular cleaning not only keeps your screen looking fresh but also helps maintain its function.
Repairing Small Tears or Damages
Small tears can happen, but they don't mean you need a whole new screen. You can easily fix minor damages with a screen repair kit, which usually includes adhesive patches. Cut a patch slightly larger than the tear, place it over the damaged area, and press firmly to secure it. For larger tears, consider replacing the section of the screen or consulting a professional. This way, your screen stays intact and continues to provide effective ventilation.
Replacing the Screen When Necessary
Over time, screens can wear out, especially if they're exposed to harsh weather conditions. If your screen looks beyond repair, it might be time for a replacement. Measure your window accurately and choose a suitable mesh material. Installing a new screen ensures your window remains functional and aesthetically pleasing. If you're a DIY enthusiast, consider using the WRS Amesbury Block & Tackle Balance for a smooth and efficient replacement process. This product is designed for non-tilt windows and makes the job easier for anyone looking to maintain their windows effectively.
Regular upkeep of your frameless window screen not only prolongs its life but also enhances your home's ventilation and appearance. Don't let small issues linger; tackle them early to keep your screens in top shape.
Troubleshooting Common Installation Issues
Dealing with Loose Screen Edges
Loose screen edges can be a real pain, especially after you've spent time getting everything just right. If your screen edges aren't sticking as they should, the first thing to check is the adhesive. Make sure the adhesive strip is clean and free from dust. Sometimes, a quick wipe with a damp cloth can do wonders. If the problem persists, consider using a stronger adhesive or adding additional support like a screen plunger.
Ensuring Proper Adhesion of the Screen
For proper adhesion, the window surface needs to be spotless. Even a tiny speck of dirt can interfere with the stickiness of your adhesive strips. Use a mild cleaner and a lint-free cloth to wipe down the window frame before applying the adhesive. Adhesion is all about pressure, so press firmly along the edges of the screen to secure it in place. If you're still having trouble, double-check that the adhesive is suitable for your window type.
Adjusting the Screen for a Perfect Fit
Getting that perfect fit can sometimes feel like a puzzle. Start by ensuring that the mesh is cut to the exact dimensions of your window. If the screen is too large, trim it carefully with sharp scissors. When placing the screen, start at one corner and work your way around, smoothing out any wrinkles or bubbles as you go. If the screen is still not fitting right, you might need to adjust the tension or reapply the adhesive. Remember, patience is key!
Don't rush the process. Taking your time to adjust and secure the screen properly will save you from headaches down the road.
Exploring Alternative Frameless Screen Options
Magnetic Screen Solutions
Magnetic screens are a clever choice for those who want a simple and effective way to keep bugs out while letting fresh air in. These screens are easy to install and remove, making them a good option for renters or anyone who likes to switch things up. The magnets hold the screen tightly against the window frame, ensuring a snug fit without the need for tools. One of the best parts? They don’t leave any marks once removed.
Velcro-Based Screen Attachments
Velcro-based screens offer another easy-to-use solution. You attach one side of the Velcro to your window frame and the other to the screen. This method allows for quick installation and removal, perfect for seasonal changes. The adhesive on the Velcro strips is strong enough to hold the screen in place but gentle enough to not damage your window frame.
DIY Custom Screen Projects
If you're feeling handy, a DIY custom screen project might be right up your alley. This option gives you full control over the materials and size, allowing you to create a screen that fits your window perfectly. You'll need some basic tools and materials, like screen mesh, a cutting tool, and adhesive or magnetic strips. Here's a simple checklist to get you started:
- Measure your window accurately to ensure a perfect fit.
- Choose the right screen material for your needs.
- Gather all necessary tools, such as scissors, a measuring tape, and adhesive.
Thinking of upgrading your window setup? Check out the 450 Series 3550 for a variety of window and door hardware solutions, including screens and accessories. It's a great resource if you're planning a DIY project or just exploring new ideas for your home.
Wrapping It Up
So there you have it, folks! Installing a window screen without a frame isn't as tricky as it sounds. With a bit of patience and the right tools, you can enjoy fresh air without the bugs. Remember, the key is to measure carefully and take your time with each step. If you mess up, don't sweat it—just try again. Practice makes perfect, right? Now, go ahead and give it a shot. Your home will thank you for the extra ventilation, and you'll feel like a DIY pro in no time. Happy installing!
Frequently Asked Questions
What are the advantages of using frameless window screens?
Frameless window screens let more air in, cost less, and look modern and nice.
How do I choose the right screen mesh for my window?
Pick a mesh that is strong and fits your window size. You can ask at a hardware store for help.
What tools do I need to put up a frameless window screen?
You will need a measuring tape, scissors, and adhesive strips to put up the screen.
How do I keep my frameless window screen in good shape?
Clean it often, fix any small holes, and change it if it gets too damaged.
What should I do if the screen edges are loose?
Try pressing down the edges again or use more adhesive to make sure it sticks well.
Can I make a frameless window screen myself?
Yes, you can try making one using magnets or Velcro for easy attachment.