A Step-by-Step Guide on How to Install Window Weather Stripping for Maximum Energy Efficiency
Installing weather stripping is a simple yet effective way to enhance your home's energy efficiency. This guide will provide you with all the necessary steps and tips to ensure your windows are properly sealed, keeping your home comfortable throughout the year. By learning how to install window weather stripping, you can save on energy costs and improve your living environment.
Key Takeaways
- Weather stripping seals gaps around windows, reducing drafts and saving energy.
- Proper installation can lead to lower heating and cooling bills.
- Basic tools like measuring tape, scissors, and adhesive are needed for installation.
- Choose the right weather stripping material based on your window type.
- Regular checks and maintenance of weather stripping will help maintain energy efficiency.
Understanding the Importance of Weather Stripping

Benefits of Weather Stripping
Weather stripping is like putting a cozy blanket around your house. You know those drafty spots that make your heating bill skyrocket? Weather stripping tackles those air leaks, keeping the warm air in during winter and the cool air in during summer. Not only does it make your home more comfortable, but it also helps save on energy costs. Here's what you get:
- Lower energy bills
- Better indoor air quality
- Reduced noise from outside
How Weather Stripping Works
So, how does this stuff actually work? It's pretty simple. When you apply weather stripping around windows and doors, it forms a seal that blocks drafts. Think of it as a barrier that stops air from sneaking in or out. This keeps your home at a steady temperature without making your HVAC system work overtime. It's all about keeping that comfy air inside where it belongs.
Common Types of Weather Stripping
There are a bunch of different kinds of weather stripping out there, and picking the right one depends on what you need. Here's a quick rundown:
- Foam Tape: Easy to apply and great for irregular gaps.
- V-Strip: Durable and works well for sealing gaps around doors.
- Door Sweeps: Perfect for the bottom of doors to block drafts.
Weather stripping is a simple fix that can make a big difference in your home's comfort and energy efficiency. It's like giving your house a little extra armor against the elements.
Choosing the Right Weather Stripping Material
Factors to Consider When Choosing Materials
Picking the right weather stripping material is like choosing the right tool for a job. You gotta think about where you're gonna use it, how often you'll be opening and closing those windows or doors, and what kind of weather you're dealing with.
- Climate Conditions: If you live in a place with harsh winters or blazing summers, your choice matters. Rubber gaskets are great for extreme weather.
- Traffic and Usage: High-traffic areas need something durable, like rubber or metal. They can handle the wear and tear.
- Ease of Installation: Some materials are easier to install than others. Foam tape is a good pick if you want something simple.
Comparing Different Types of Weather Stripping
Here's a quick rundown of the common types:
- Foam Weather Stripping: Cheap and easy to install. Perfect for small gaps, but not the most durable.
- Rubber Weather Stripping: Durable and flexible. Great for doors and windows, and it stands up well to weather.
- Metal Weather Stripping: Super tough and lasts a long time. It's a bit harder to install but worth it for high-traffic areas.
When picking your weather stripping, think about how long you want it to last, how easy it is to put on, and if it works with your windows and doors.
Where to Purchase Weather Stripping Materials
You can grab weather stripping at most hardware stores or online. They've got everything from foam tape to rubber gaskets. Look for something that fits your needs, like the WRS 1/8" Offset Aluminum Storm Door Panel Clips if you're securing storm door panels. They're part of a big range of window and door hardware, so you should find what you need easily.
Preparing Your Windows for Weather Stripping Installation
Cleaning and Inspecting the Window Frame
First things first, you gotta clean those window frames. Grab some soap and water, and scrub away any dirt or grime. If the surface is rough, give it a light sand to smooth it out. A clean surface means the weather stripping will stick better. After cleaning, take a good look at the window frame. Check for any damage or areas that might need repair before you start.
Removing Old Weather Stripping
Got old weather stripping? Time to say goodbye. Carefully pull it off the window frame. If it's being stubborn, a putty knife can help you get it off. Once it's gone, clean the area again to get rid of any leftover adhesive or dirt. This step is key to making sure the new stuff sticks well.
Gathering Necessary Tools and Materials
Before you dive into the installation, make sure you have everything you need:
- Utility knife or scissors
- Tape measure
- Screwdriver (if needed)
- Putty knife (handy for stubborn old stripping)
- Your chosen weather stripping material
Prepping your windows right makes the whole process smoother and helps your new weather stripping do its job—keeping your home cozy and energy-efficient.
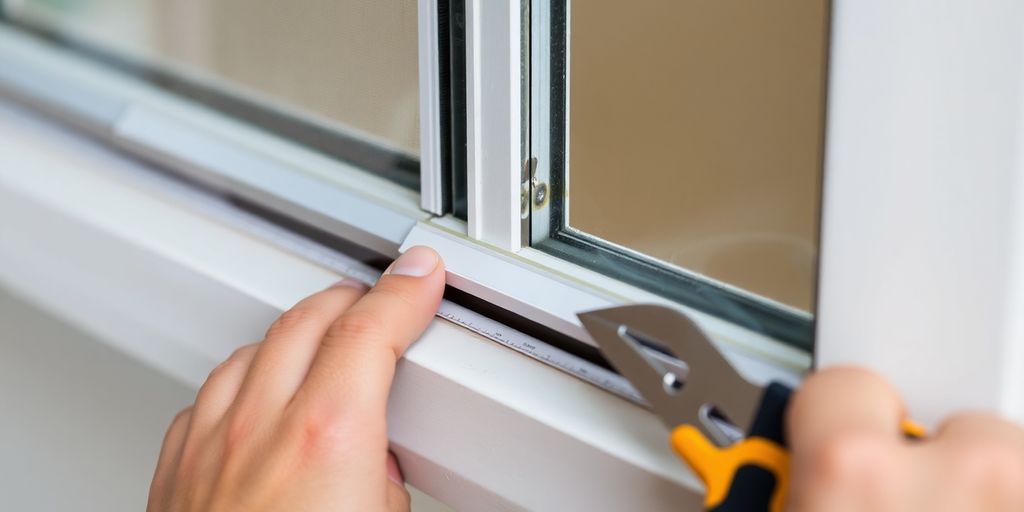
Step-by-Step Guide to Installing Weather Stripping on Windows
Measuring and Cutting Weather Stripping
Alright, first things first. You gotta measure your windows. Grab a tape measure and jot down the height and width of the window frame. Add an extra inch or two, just in case. Better too long than too short, right? Once you've got your measurements, cut the weather stripping to fit. Accurate measuring is super important for a snug fit.
Applying Weather Stripping to Windows
Now comes the fun part. Make sure the window surface is clean. No dust, no old bits of weather stripping sticking around. Peel off the backing from your weather stripping and press it along the window edges. Press firmly to make sure it sticks. If you want, you can use a staple gun or small nails for extra hold.
Testing the Seal for Effectiveness
Once everything's in place, shut the window and check for gaps. If there's a draft sneaking through, adjust the weather stripping. You want that tight seal. A good seal means less cold air sneaking in, which is what we’re aiming for here.
Keeping your windows sealed tight helps keep your home cozy and your energy bills in check. A little effort now can make a big difference later.
Maintaining and Replacing Weather Stripping
Signs Your Weather Stripping Needs Replacement
Weather stripping is super important for keeping your house cozy and energy-efficient. But, like everything else, it wears out eventually. Check for cracks, tears, or if it looks worn out. If it doesn’t seal well anymore, it’s time to swap it out.
How to Remove Old Weather Stripping
- Start by gently pulling the old weather stripping off. Take your time so you don’t damage the window or door frame.
- Use a putty knife to scrape off any stubborn bits. This might take a little elbow grease.
- Clean the area really well. Get rid of any dirt or leftover adhesive so the new stuff sticks properly.
Tips for Prolonging the Life of Weather Stripping
- Regularly check your weather stripping for any signs of damage.
- Clean it every now and then to remove dirt and debris.
- Replace any damaged sections as soon as you notice them.
Keeping your weather stripping in good shape is just as important as installing it right. A little maintenance goes a long way in avoiding big repairs and keeping your home comfy.
For more on window hardware components and tools, consider looking into the WRS Surface Mounted Guide for versatile solutions.
Additional Tips for Maximizing Energy Efficiency

Insulating Attics and Walls
So, you wanna keep your house cozy without breaking the bank? Insulating your attic and walls is a game-changer. Proper insulation helps keep the heat in during the winter and out during the summer. Here’s what you can do:
- Check your attic insulation. If it looks thin, add more.
- Use fiberglass or foam board for walls.
- Seal any visible gaps or cracks.
Sealing Other Air Leaks
Don’t let sneaky drafts steal your comfort. Sealing air leaks is like putting a lid on your energy expenses. Here’s how:
- Inspect doors and windows for gaps.
- Use weatherstripping or caulk to seal them up.
- Consider adding door sweeps to keep the drafts out.
Regular Maintenance Checks
Keeping things running smoothly is key. Regular maintenance checks can save you a lot of hassle and cash in the long run.
Regularly checking your home for leaks and insulation issues can prevent bigger problems down the road.
- Schedule a yearly inspection of your insulation and seals.
- Replace worn-out weather stripping.
- Keep an eye on your energy bills for unusual spikes.
Final Thoughts
Installing weather stripping is a smart and simple way to make your home more energy-efficient. By following the steps in this guide, you can close up gaps around your doors and windows, which helps keep your home warm in the winter and cool in the summer. This not only makes your living space more comfortable but also helps you save money on your energy bills. Remember, taking a little time now can lead to big savings and a cozier home throughout the year.
Frequently Asked Questions
What is weather stripping?
Weather stripping is a material used to seal gaps around doors and windows to stop air from leaking in or out.
Why do I need weather stripping?
Weather stripping helps keep your home comfortable by blocking drafts, which can save you money on heating and cooling bills.
How can I tell if my weather stripping needs to be replaced?
If you feel drafts, notice higher energy bills, or see cracks or peeling in the material, it's time to replace it.
What tools do I need for installing weather stripping?
You'll need a tape measure, scissors or a utility knife, and possibly a screwdriver for installation.
Can I install weather stripping by myself?
Yes! Installing weather stripping is a simple DIY project that most homeowners can do with basic tools.
Where can I buy weather stripping materials?
You can find weather stripping at hardware stores, home improvement shops, and online.