A Step-by-Step Guide on How to Remove Screen from Window Without Damage
Taking out a window screen sounds simple, right? But if you've ever tried it, you know it can quickly become a headache. Whether you're cleaning, fixing, or just want some fresh air, knowing how to remove a screen without wrecking it—or your window—is key. This guide breaks down the steps and tools you need to make the process smooth and damage-free. Let's get into it!
Key Takeaways
- Always gather your tools like a screwdriver and pliers before starting.
- Open the window fully to make screen removal easier.
- Identify how the screen is attached—clips, screws, or pins.
- Handle screens carefully to avoid bending or breaking them.
- Store screens in a dry place to keep them in good condition.
Gathering Essential Tools for Screen Removal

Removing a window screen doesn't have to be a hassle, but having the right tools at hand makes all the difference. Let's break down what you'll need to make this task as smooth as possible.
Choosing the Right Screwdriver
First on the list is a trusty screwdriver. Whether it's a flathead or a Phillips, make sure it's the right fit for the screws or clips holding your screen. Using the correct screwdriver helps prevent stripping screws, which can turn a simple task into a frustrating ordeal.
Using Pliers Effectively
Pliers are more than just a backup tool. They're perfect for gripping and pulling out stubborn clips or pins that don't want to budge. You might also find them useful for cutting wires if your screen setup is a bit more complex. Remember, a good grip with your pliers can save you a lot of time and effort.
Preparing a Putty Knife
A putty knife is your go-to if the screen seems glued to the frame. Gently slide it between the screen and the frame to loosen things up without causing damage. It's all about that gentle nudge to get things moving without bending the frame or tearing the screen.
Having these tools ready before you start can turn a potentially difficult job into a quick and easy one. A little preparation goes a long way in ensuring a hassle-free screen removal.
When you're equipped with the right tools, removing window screens is less about struggling and more about getting the job done efficiently. If you find you're missing something, check out products like the 5 Pack Screen Plunger Assembly to ensure your screens stay securely in place after removal and reinstallation.
Preparing Your Workspace for Safe Screen Removal

Clearing the Area Around the Window
First up, make sure the area around your window is free of clutter. Move any furniture or items that might be in the way. This not only makes the job easier but also prevents potential accidents. A clear workspace is a safe workspace, so take a few minutes to tidy up before you start.
Laying Down a Drop Cloth
Next, lay down a drop cloth beneath the window. This simple step catches any dirt or debris that might fall during the removal process, making cleanup a breeze. It also helps protect your floors from scratches or stains. If you don't have a drop cloth, an old sheet or towel can work in a pinch.
Ensuring Good Lighting
Finally, ensure your workspace is well-lit. Good lighting is essential for seeing small screws or clips that might need removing. If natural light isn’t enough, consider using a portable lamp. Proper lighting helps you work more efficiently and reduces the risk of mistakes.
Taking the time to prepare your workspace properly can make the removal process much smoother. It's all about setting yourself up for success, right from the start.
By following these steps, you'll be ready to tackle the task of removing window screens with confidence. And if you're in need of any window hardware components, the WRS 1-1/2" x 3" Surface Mounted Guide is a versatile option that might come in handy for your window projects.
Understanding Different Window Types for Screen Removal
Removing window screens isn't a one-size-fits-all task. Different window types require different techniques. Let's break it down:
Removing Screens from Hung Windows
Hung windows are pretty common, and getting their screens out is usually straightforward:
- Start by opening the window fully. This gives you all the space you need to work.
- Look for tiny clips or pins on the sides of the screen frame.
- Carefully pop these clips or pins out to release the screen.
Handling Screens in Slider Windows
Slider windows are a bit different:
- Slide the screen towards the inside of the house.
- If it feels stuck, check for screws or clips that might need loosening first.
- Once it's free, carefully pull the screen out.
Detaching Screens from Casement Windows
Casement windows have their own quirks:
- Open the window outward completely.
- Find the latches on the sides of the screen.
- Unhook these latches to remove the screen from its frame.
Tip: Always handle screens gently to avoid bending or damaging them. If replacements are needed, consider using the WRS 1-1/2" x 3" Surface Mounted Guide for a snug fit and easy installation. It's designed to be durable and user-friendly, making it a handy tool for home upkeep.
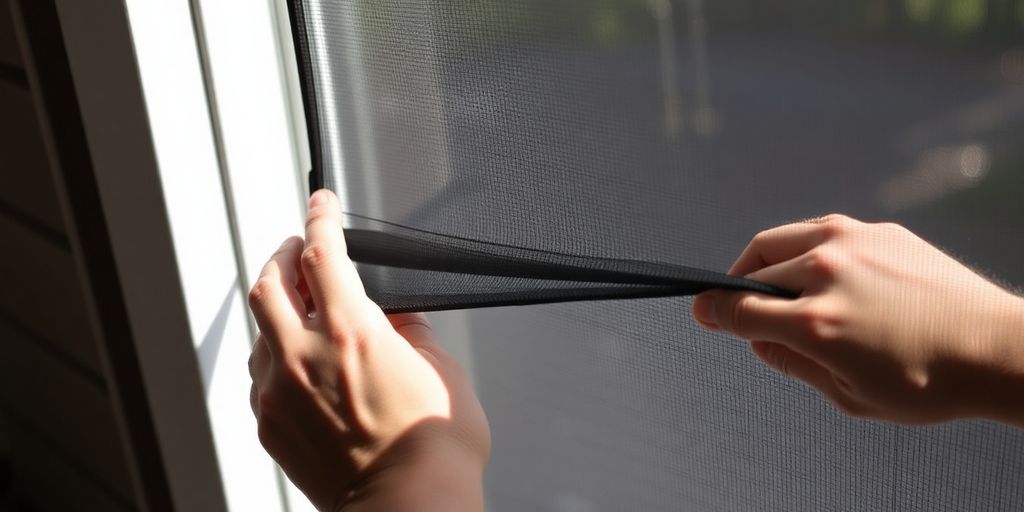
Step-by-Step Process for Removing Window Screens
Opening the Window Fully
First things first, make sure you open the window all the way. This gives you the best access to the screen and makes it easier to work. Check for anything that might block the window from opening completely. Opening the window fully is a simple step that can make a big difference.
Identifying Attachment Mechanisms
Before you start pulling on the screen, take a closer look at how it's attached. Most screens are held in place by clips, pins, or screws. Knowing what you're dealing with helps you choose the right approach and tools. If you're unsure, a quick inspection should reveal the attachment method.
Using Tools to Pry the Screen
Once you know how the screen is attached, it's time to get your tools ready. A screwdriver, pliers, or a putty knife can be super helpful depending on the attachment type. Gently work around the edges of the screen, prying it loose without forcing anything. If you feel resistance, pause and reassess to avoid damaging the frame or screen. Patience is key here, as rushing can lead to bending or breaking the screen.
Remember, each step is important for a smooth removal process. Take your time and handle the screen carefully to keep it in good shape.
Handling and Storing Screens Safely
Avoiding Damage During Removal
When you’re taking out a window screen, it's super important to be gentle. Always hold the screen by its frame to avoid putting pressure on the mesh, which can tear or warp. Watch out for sharp edges that might cut you.
Proper Techniques for Handling Screens
To keep your screens in top shape, follow these handling tips:
- Lift the screen carefully from the frame, ensuring you don't twist or bend it.
- Store it upright, which helps prevent bending or warping.
- Cover it with a soft cloth if you're planning to store it for a long time to keep dust off.
Best Practices for Storing Screens
Good storage habits can really extend the life of your screens:
- Dry Location: Keep screens in a dry place to avoid moisture damage.
- Avoid Sunlight: Direct sun can fade and weaken the materials.
- Use a soft cover to protect against dust and scratches.
Taking a bit of time to store your screens properly can save you from buying new ones sooner than you’d like. Simple precautions can keep them looking new and functioning well for years.
For those times when you need to replace parts, consider the 5 Pack Screen Plunger Assembly. It's a handy kit for securing window screens effectively.
Troubleshooting Common Screen Removal Issues
Dealing with Stuck Screens
Sometimes, those window screens just don't want to budge. It's like they're glued in there. Here's a few tips to get them moving:
- Use a putty knife: Gently slide it around the edges to loosen any sticky spots.
- Apply a bit of pressure while pulling: This can help release any stubborn areas.
- Check for hidden screws or clips: Sometimes, they hide in plain sight and keep the screen locked in.
Patience is your best friend when dealing with tricky screens. Taking your time can prevent damage and make the process smoother.
Addressing Bent or Damaged Frames
A bent frame can turn screen removal into a real headache. Here's how to tackle it:
- Inspect the frame closely for any bends or warps.
- Gently push the frame back into shape if possible.
- If the damage is too severe, consider replacing that part.
Replacing Missing Clips or Pins
Loose or missing clips can make your screen feel like it’s about to fall out. Here’s how to fix this:
- Check all clips to ensure they’re securely fastened.
- Replace any missing clips with new ones.
- Tighten any loose screws to hold the screen firmly in place.
Remember, a well-maintained screen not only looks good but also keeps bugs out effectively! If you're dealing with non-tilt windows, consider using the WRS Amesbury Block & Tackle Balance for a smooth and secure function.
Reinstalling Window Screens After Maintenance
Aligning the Screen with the Frame
Once you've cleaned and inspected your window screens, it's time to put them back in place. Aligning the screen properly with the window frame is crucial to ensure it fits snugly and securely. Start by holding the screen at a slight angle and gently position the bottom edge into the frame track. Next, tilt the screen upright and carefully slide it into the top track. Make sure the screen sits evenly along all edges, checking that there are no gaps or misalignments.
Securing the Screen in Place
With the screen aligned, the next step is to secure it within the frame. Depending on your window type, you might need to use clips, pins, or screws to hold the screen steady. If your window uses a bottom sash guide, ensure it's properly aligned for a snug fit. For those using a 7/8" bottom sash guide, this compatibility ensures a secure attachment. Double-check that all fasteners are tight and the screen doesn't wobble or shift when touched.
Testing the Screen for Stability
Before calling it a day, give the screen a thorough test. Open and close the window a few times to see if the screen stays in place. Lightly press on different parts of the screen to ensure it doesn't pop out or shift. If it feels loose, revisit the securing steps and adjust as necessary. A stable screen not only looks neat but also keeps bugs out and lets fresh air in without any hassle.
Taking the time to reinstall your window screens properly can prevent future headaches. A secure fit means less maintenance down the road and more peace of mind knowing your home is well-protected.
Wrapping Up: Easy Window Screen Removal
So, there you have it! Taking out a window screen isn't as tough as it might seem. With the right tools and a bit of patience, you can have those screens out in no time. Whether you're cleaning, fixing, or just letting in a breeze, knowing how to handle your screens makes life a little easier. Just remember to be gentle and store them safely when you're done. Give it a try, and you'll see how simple it can be. Happy screen removing!
Frequently Asked Questions
What tools do I need to remove a window screen?
You'll need a screwdriver, pliers, and a putty knife. If the window is high, a step stool might be handy too.
How can I take out a window screen safely?
First, open the window all the way. Then, find the clips or screws and gently remove them before lifting the screen out.
Is it okay to clean window screens while they're out?
Yes, it's a perfect time to clean them! You can use mild soap and water to scrub away dirt.
How can I tell if my screen is held by clips or screws?
Look closely at the screen's edges. If you see small clips or screws, that's how it's attached.
Can I remove a window screen without breaking it?
Yes! Handle it gently and don't use too much force, and you can avoid any damage.
What should I do if my screen is stuck?
Try gently wiggling it or use a putty knife to loosen it. Avoid using too much force to prevent damage.