Essential Guide to Window Screen Repair: Tips and Tricks for DIY Success
Repairing window screens is easier than it sounds. With a few simple tools and some basic know-how, you can fix or replace your screens and keep your home looking sharp while keeping bugs out. This guide will walk you through everything you need to know about window screen repair, from the tools you'll need to the steps for a successful DIY project.
Key Takeaways
- Window screens protect your home from pests while allowing fresh air in.
- Basic tools like a spline roller and utility knife are essential for repairs.
- Small tears can often be patched, but larger damage may require a full replacement.
- Regular maintenance can extend the life of your screens and keep them looking good.
- Decide whether to DIY or hire a pro based on your comfort level and the complexity of the job.
Understanding Window Screens
Importance of Window Screens
Window screens are more important than many people realize. They're not just there to keep bugs out, although that's a big part of it! They also help to keep leaves, dust, and other debris from entering your home. This can significantly improve your indoor air quality and reduce the amount of cleaning you have to do. Plus, they allow you to open your windows and enjoy fresh air without worrying about unwanted guests.
Think of window screens as a simple, cost-effective way to maintain a comfortable and clean living environment. They're a small investment that can make a big difference in your daily life.
Common Types of Window Screens
There are several types of window screens available, each with its own set of advantages and disadvantages. The most common types include:
- Fiberglass screens: These are the most affordable and widely used. They're flexible, durable, and resistant to rust and corrosion. However, they can be easily damaged by pets or sharp objects.
- Aluminum screens: These are stronger and more durable than fiberglass screens, making them a good choice for high-traffic areas or homes with pets. They're also more resistant to damage from the elements. However, they can be more expensive than fiberglass screens and may be prone to corrosion in coastal areas. Consider aluminum screens if you need something sturdy.
- Solar screens: These screens are designed to block out a significant amount of sunlight and heat, helping to keep your home cooler in the summer. They can also help to reduce glare and protect your furniture from fading. However, they can be more expensive than other types of screens and may reduce the amount of natural light entering your home.
- Pet screens: These are made from extra-durable materials that can withstand the wear and tear of pets. They're a good choice for pet owners who want to keep their screens intact.
Components of a Window Screen
Understanding the different parts of a window screen can help you when it comes time for repair or replacement. Here's a breakdown of the key components:
- Frame: This is the outer structure of the screen, typically made of aluminum, wood, or vinyl. The frame provides support and holds the screen mesh in place.
- Mesh: This is the actual screening material that keeps bugs out. It's usually made of fiberglass, aluminum, or polyester. The mesh is stretched tightly across the frame.
- Spline: This is a flexible cord that fits into a groove in the frame, securing the mesh in place. The spline is essential for keeping the screen taut and preventing it from sagging. Make sure you get the right spline size for your screen.
- Corners: These connect the frame pieces together and provide additional stability. They can be made of plastic or metal.
- Attachment hardware: This includes the clips, latches, or other mechanisms used to attach the screen to the window frame.
Essential Tools for Window Screen Repair
Must-Have Tools for DIY Repair
Okay, so you're thinking about fixing your window screens yourself? Awesome! First, you gotta get your hands on the right tools. It's like trying to bake a cake without a mixing bowl – possible, but messy and frustrating. Having the right tools makes the job way easier and gives you a better result. Here's a list of what I consider essential:
- Screen Roller Tool: This little gadget is a lifesaver. It helps you press the spline into the frame to hold the screen in place. Trust me, you don't want to try doing this by hand.
- Utility Knife: For cutting the screen material. A sharp blade is key for clean cuts. You don't want frayed edges.
- Spline: This is the rubber or vinyl cord that holds the screen in the frame. Make sure you get the right diameter for your screen frame. Too big or too small, and it won't work.
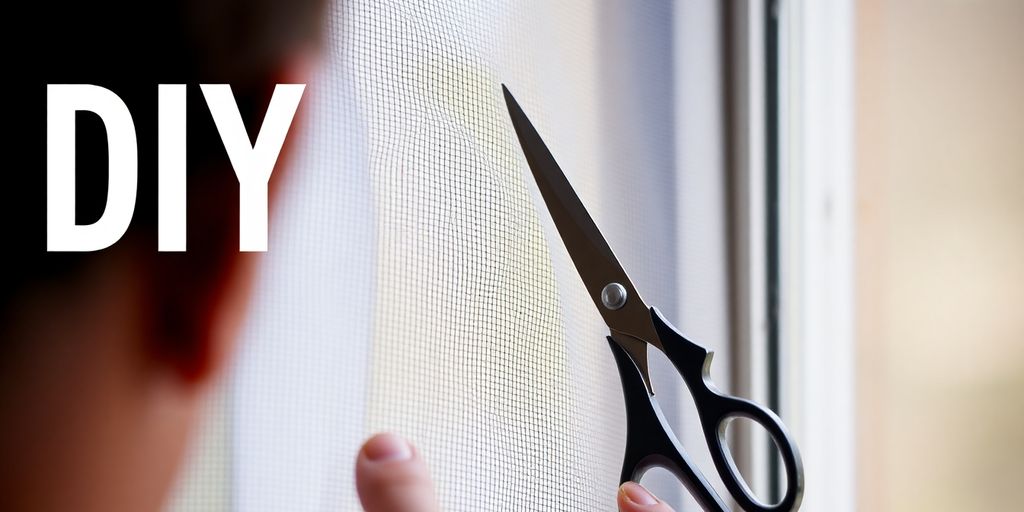
- Scissors: For rough cuts of the screen material. I like to use these to get the screen close to the right size before using the utility knife for the final trim.
- Flathead Screwdriver or Staple Remover: You'll need this to remove the old screen and spline. Sometimes those old splines are really stuck in there.
Don't skimp on the tools. Cheap tools can make the job harder and the results worse. It's better to invest in decent quality tools that will last. Plus, you'll probably use them for other projects around the house.
Choosing the Right Screen Material
Choosing the right screen material is important. It's not just about picking whatever's cheapest. You need to think about what you need the screen to do. Here are some options:
- Fiberglass: This is the most common type of screen material. It's affordable and easy to work with. It's a good all-around choice.
- Aluminum: More durable than fiberglass, but also more expensive. It's a good choice if you have pets or live in an area with a lot of storms.
- Pet-Resistant: Made from heavy-duty material that can withstand claws and teeth. If you have pets, this is a must.
- Solar Screen: Designed to block out some of the sun's rays. This can help keep your house cooler in the summer. Consider the benefits of hiring a professional if you're unsure about the best material for your needs.
Safety Equipment to Consider
Okay, so window screen repair isn't exactly the most dangerous job in the world, but it's still important to take some basic safety precautions. Here's what I recommend:
- Gloves: Protect your hands from cuts and scrapes. Plus, they'll keep your hands clean.
- Safety Glasses: Protect your eyes from flying debris. Especially important when you're cutting the screen material.
- Work Clothes: Wear clothes that you don't mind getting dirty or torn. You're going to be working with sharp tools and potentially messy materials.
Step-by-Step Guide to Window Screen Replacement
Replacing a window screen might seem hard, but it's totally doable. I'll walk you through the steps. It's a great way to save some money and get your screens looking good as new. Plus, keeping those bugs out is a major win!
Removing the Old Screen
Okay, first things first, you gotta get that old, torn-up screen out. Understanding your window type is important here.
- Unlock the window. Seems obvious, but you'd be surprised.
- Open the window. Slide it up or down, depending on what kind you have.
- Look for latches or springs on the sides of the screen frame. These hold the screen in place.
- If there are springs, squeeze the frame gently to release them. If it's latches, just flip them.
- Carefully pull the screen out. Don't force it; you don't want to damage the frame.
Make sure you have a good grip. Dropping the screen can be a pain, especially if you're working on an upper floor.
Measuring and Cutting New Screen
Now for the new screen. This part is all about getting the right size. You'll need a fiberglass screen material roll for this step.
- Lay the old screen on a flat surface. If it's too ripped up to use as a template, measure the inside of the screen frame.
- Add about 2 inches to each side of your measurement. This gives you extra material to work with when you're installing the screen.
- Lay the new screen material on a flat surface and use a utility knife or scissors to cut it to the size you measured.
Installing the New Screen
This is where it all comes together. You'll need a screen roller tool and some new spline.
- Place the screen material over the frame, making sure it overlaps evenly on all sides.
- Use the screen roller tool to press the screen into the groove on the frame. Start at one corner and work your way around.
- As you roll, the screen will be held in place by the spline. Make sure the spline is properly seated in the groove.
- Once you've gone all the way around, use the utility knife to trim off the excess screen material.
- Pop the screen back into the window. You should hear a click or feel it snap into place. If not, double-check that the latches or springs are engaged.
Quick Fixes for Minor Screen Damage
Using Screen Repair Patches
So, you've got a tiny hole in your window screen? Don't panic! A screen repair patch is often the quickest and easiest solution. These patches usually come with an adhesive backing. You just peel, stick, and you're done! For the best results, clean the area around the hole first. Cut the patch slightly larger than the damage. Press it firmly onto the screen. Some patches even need a little heat from a hairdryer to fully adhere. I used one of these screen repair products last summer when a bird decided my screen was a good place to land, and it held up surprisingly well.
Applying Adhesive for Small Tears
For small tears, sometimes a bit of adhesive can do the trick. Clear adhesives work best because they're less noticeable. You'll want to use something flexible, so it doesn't crack when the screen moves. Apply a small amount to the edges of the tear, then gently press them together. Hold it in place for a few minutes until the adhesive sets. It's not a perfect fix, but it can prevent the tear from getting bigger. I've found that a toothpick helps with precise application. Here's a quick guide:
- Clean the area around the tear.
- Apply a small amount of flexible adhesive.
- Press the edges together and hold.
Temporary Solutions for Urgent Repairs
Sometimes, you need a fix now, even if it's not pretty. Here are a few temporary solutions for urgent repairs:
- Duct tape: Yes, it's not elegant, but it works in a pinch. Just be aware that it can leave a sticky residue and might damage the screen further when you remove it.
- Clear packing tape: A slightly better option than duct tape, as it's less likely to leave residue. Still, it's not a long-term solution.
- Clothespins or binder clips: For larger tears, you can use these to hold the edges together until you can get a proper repair kit. This is especially useful if you have aluminum screens that are pulling away from the frame.
I remember one time, a rogue baseball went right through my screen just before a huge thunderstorm. I didn't have any repair supplies on hand, so I grabbed some packing tape and went to town. It wasn't pretty, but it kept the bugs out until I could get to the hardware store the next day. Sometimes, you just gotta do what you gotta do!
Cost Considerations for Window Screen Repair

Alright, let's talk money. Fixing up your window screens doesn't have to break the bank, but it's good to know what you're getting into. I'll walk you through figuring out a budget, comparing prices, and what can make those costs go up or down. It's all about making smart choices so you can enjoy that fresh air without emptying your wallet.
Budgeting for DIY Repairs
So, you're thinking of doing it yourself? Awesome! The first step is figuring out how much you can spend. Start by listing all the things you'll need: screen material, spline, a spline roller tool, maybe a utility knife if yours is dull. Fiberglass is usually the cheapest screen option, but if you have pets, you might want to spend a bit more on something tougher. Don't forget things like tape or glue for small fixes. Add it all up, and that's your DIY budget. Remember to check if you already have some of the tools; no need to buy something you already own!
Comparing Costs of Professional Services
Not feeling the DIY route? No problem. Getting a pro to do it has its perks, but it'll cost you more. Get quotes from a few different companies. Ask them what kind of screen they use and what their labor costs are. Some companies charge by the screen, others by the hour. Make sure you know what you're paying for. Also, check reviews! A cheaper price isn't worth it if the work is bad. Sometimes, it's worth spending a little extra for quality and peace of mind. Professional services can save you time and guarantee a job well done.
Factors Affecting Repair Costs
Okay, so what makes the price go up or down? A few things. The size of your window, obviously. Bigger window, bigger screen, more money. The type of screen material matters too. Like I said, fiberglass is cheap, but pet-resistant screens or solar screens will cost more. If your window frame is damaged, that's extra work and extra cost. And of course, where you live can affect prices too. Big cities usually have higher labor costs than smaller towns. Here's a quick rundown:
- Size of the window
- Type of screen material
- Condition of the frame
- Your location
Remember, a little planning can save you a lot of money. Get a few quotes, compare materials, and decide what's most important to you. Happy fixing!
DIY vs. Professional Window Screen Replacement
When to Choose DIY
So, you're thinking about fixing your window screens yourself? It's doable! If you're the kind of person who enjoys tackling small home projects and doesn't mind a bit of a challenge, DIY might be the way to go.
Here's when it makes sense:
- You're comfortable with basic tools like a screwdriver, utility knife, and screen roller tool.
- The damage is minor – a small tear or a simple puncture.
- You have the time and patience to learn a new skill. There are tons of online tutorials to guide you.
- You want to save money. DIY repairs are almost always cheaper than hiring a professional.
Benefits of Hiring a Professional
Okay, let's be real. Sometimes, DIY isn't the best option. If you're short on time, not particularly handy, or dealing with a more complex situation, bringing in a pro can save you a lot of headaches. Professionals have the experience and tools to get the job done quickly and efficiently.
Here's why you might want to consider hiring someone:
- You have a lot of screens to repair or replace. Doing them all yourself can be time-consuming.
- The damage is extensive – a bent frame, a large tear, or specialized pet-resistant screens.
- You want a perfect, professional-looking result. Let's face it, sometimes our DIY attempts don't quite measure up.
- You simply don't enjoy home repair projects. Life's too short to spend time doing things you hate!
Evaluating Your Skill Level
Before you decide, take an honest look at your skills and comfort level. Can you confidently handle the tools and materials involved? Are you willing to invest the time to learn the necessary techniques? If you're unsure, it's always better to err on the side of caution and call in a professional.
Think of it this way: DIY is like baking a cake from scratch. It can be rewarding, but it also requires some skill and effort. Hiring a professional is like buying a cake from a bakery. It's more expensive, but you're guaranteed a delicious result with minimal effort on your part.
Maintaining Your Window Screens

It's easy to forget about your window screens once they're installed, but a little regular maintenance can really extend their life and keep them working well. Think of it like changing the oil in your car – a small effort that prevents bigger problems down the road. Plus, clean screens just look nicer and let more fresh air in!
Regular Inspection Tips
Make it a habit to check your screens every few months, especially after storms or periods of high wind. Look for:
- Tears or holes, even small ones, as these can quickly get bigger.
- Loose or damaged spline, the rubber cord that holds the screen in the frame.
- Bent or damaged frames. A warped frame can make it hard to remove and reinstall the screen.
- Buildup of dirt, dust, pollen, or debris. This can reduce airflow and make your screens look dingy.
Cleaning and Care Techniques
Cleaning your screens is a simple task that can make a big difference. Here's what I usually do:
- Remove the screens from the window frames. It's easier to clean them when they're flat.
- Brush off loose dirt and debris with a soft brush or vacuum cleaner attachment. A handheld vacuum works great.
- Wash the screens with a mild soap and water solution. I use dish soap. Rinse thoroughly with a hose.
- Let the screens dry completely before reinstalling them. I usually lean them against the house in the sun.
For tougher stains, you can try a gentle scrub brush or a specialized screen cleaner. Avoid using harsh chemicals or abrasive cleaners, as these can damage the screen material. Also, consider removing window screens during the winter months to protect them from harsh weather conditions.
Signs It's Time for Replacement
Even with regular care, window screens eventually wear out. Here are some signs that it might be time for a replacement:
- Large or numerous tears that can't be easily repaired with a patch.
- A screen that's become brittle or discolored.
- A frame that's severely damaged or warped.
- If you're constantly repairing the same screen, it might be more cost-effective to just replace it.
Replacing a screen isn't too hard, and it's way cheaper than replacing a whole window. Plus, new screens can really improve the look of your house and keep those pesky bugs out. Don't wait until your screens are falling apart – a little maintenance goes a long way!
Wrapping It Up
So, there you have it! Repairing or replacing your window screens isn’t as tough as it might seem. With just a few tools and some patience, you can tackle this project yourself. Whether you’re fixing a small tear or swapping out an entire screen, it’s a great way to keep your home looking nice and keep those pesky bugs out. If you feel up to it, give it a shot! But if you find yourself overwhelmed or have a lot of screens to deal with, don’t hesitate to call in a pro. Just remember, whether you DIY or hire someone, your home will thank you for the fresh air and comfort.
Frequently Asked Questions
What tools do I need to repair a window screen?
To fix a window screen, you will need a few basic tools like a utility knife, scissors, a spline roller, and some new screen material.
How much does it cost to repair a window screen?
Repairing a window screen is usually cheap, especially for small holes. You can often use patches or adhesive that cost just a few dollars.
Can I just replace the screen and not the whole frame?
Absolutely! You can replace just the screen part without needing to change the entire frame.
How do I know if my screen needs to be replaced?
If you see large tears, holes, or if the screen looks old and worn out, it’s a good idea to replace it.
Is it easy to repair a window screen myself?
Yes, repairing a window screen is a simple project that most people can do by following a few easy steps.
When should I hire a professional for screen repair?
If you have many screens to replace or if the job seems too complicated, it might be best to hire a professional.