How to Fix Old Windows with Ropes: A Step-by-Step Guide to Restoring Your Sash Cords
If you have old sash windows that are not working well, you might be wondering how to fix them. One of the best ways to bring them back to life is by replacing the sash cords. This guide will walk you through each step, making the process easy to understand and follow. Whether you're a beginner or have some experience, you'll find helpful tips and tricks to restore your windows using ropes.
Key Takeaways
- Sash windows have several parts that work together, and understanding them helps in repairs.
- Old sash windows often have issues like broken cords or frames that need fixing.
- Sash cords are crucial because they help the window open and close smoothly.
- Gathering the right tools and materials is important for a successful repair.
- Regular maintenance after fixing your windows can help them last longer.
Understanding the Anatomy of Sash Windows

Sash windows are a classic feature in many homes, and understanding their parts is key to fixing them. These windows consist of several important components that work together to function properly. Here’s a breakdown of the main parts:
Components of a Sash Window
- Sash: The frame that holds the glass panes.
- Weights: Heavy pieces that balance the sash, allowing it to open and close easily.
- Ropes: These connect the sash to the weights, helping to lift and lower the window.
- Cams: For example, the wrs 1-9/16" black sash cam is a durable plastic part that is essential for window functionality, engaging the block and tackle balance.
Common Problems with Old Sash Windows
- Rope wear: Over time, the ropes can fray or break.
- Sash misalignment: The sash may not sit properly in the frame.
- Drafts: Old windows can let in air, making your home less energy efficient.
Importance of Sash Cords in Window Functionality
Sash cords are crucial for the smooth operation of sash windows. They allow the window to move up and down without much effort. If the cords are damaged, the window can become stuck or hard to open.
Maintaining your sash windows is essential for both functionality and energy efficiency. Regular checks can prevent bigger problems down the line.
Essential Tools and Materials for Sash Cord Replacement
When it comes to replacing sash cords, having the right tools and materials is crucial. Using the correct tools can make the job easier and more efficient. Here’s what you’ll need:
Gathering the Right Tools
- Pry Bar: For removing window stops.
- Screwdriver: To take out screws holding the sash in place.
- Utility Knife: For cutting the new rope to size.
Selecting the Best Rope for Sash Cords
When choosing rope, consider:
- Material: Cotton or synthetic options are common.
- Thickness: Ensure it matches the original cord size.
- Durability: Look for ropes that can withstand wear and tear.
| Rope Type | Material | Price |
|---|---|---|
| Cotton Rope | Cotton | $0.50/ft |
| Synthetic Rope | Nylon | $0.75/ft |
Safety Equipment and Precautions
Always prioritize safety by using:
- Safety Glasses: Protect your eyes from debris.
- Gloves: Keep your hands safe while working.
- Dust Mask: Prevent inhaling dust from old materials.
Remember, taking the time to gather all necessary tools and materials will help ensure a smooth repair process.
In summary, having the right tools, selecting the best rope, and using safety equipment are essential steps in replacing sash cords effectively. Don't overlook these important aspects!
Preparing Your Window for Repair
Removing the Window Stops
To start, you need to carefully take off the window stops. These are the pieces that hold the window in place. Use a flathead screwdriver to gently pry them away from the frame. Be cautious not to damage the wood.
Safely Extracting the Sash
Next, you will need to remove the sash, which is the part of the window that holds the glass. To do this, lift the sash up and out of the frame. Make sure to support it properly to avoid any accidents. This step is crucial for accessing the sash cords.
Inspecting the Window Frame
Once the sash is out, take a good look at the window frame. Check for any signs of damage or rot. If you find any issues, you may need to repair them before moving on. Here’s a quick checklist:
- Look for cracks or gaps in the wood.
- Check for signs of water damage.
- Ensure the frame is still sturdy.
Remember, a well-prepared window frame is key to a successful repair.
| Component | Condition Check | Action Needed |
|---|---|---|
| Window Stops | Intact or damaged | Repair or replace |
| Sash | Smooth operation | Clean or repair |
| Frame | No rot or cracks | Fix or reinforce |
By following these steps, you will be ready to replace the sash cords effectively. This preparation is essential for a smooth repair process!
Replacing the Sash Cords

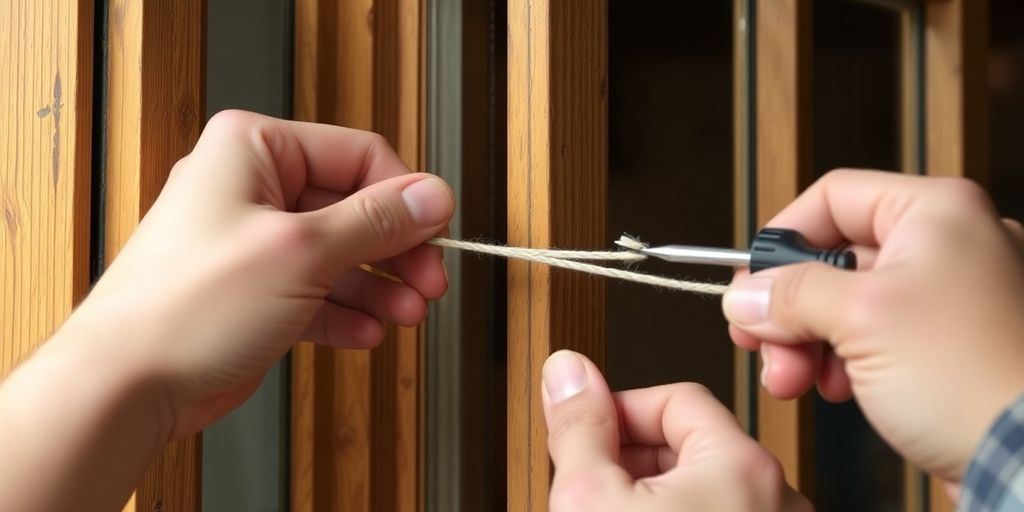
Measuring and Cutting the New Rope
To start, you need to measure the length of the new rope. Make sure to measure twice to avoid mistakes. Here’s how to do it:
- Remove the old cord and measure its length.
- Cut the new rope to the same length, plus a little extra for tying.
- Use a sharp knife or scissors for a clean cut.
Attaching the Rope to the Sash Weight
Next, you’ll attach the new rope to the sash weight. This is important for the window to work properly. Follow these steps:
- Take one end of the rope and tie it securely to the sash weight.
- Make sure the knot is tight so it won’t slip off.
- You can use a double knot for extra security.
Securing the Rope to the Sash
Finally, you need to secure the other end of the rope to the sash. This step is crucial for the window’s movement. Here’s how:
- Thread the rope through the pulley at the top of the window frame.
- Attach the rope to the sash using a strong knot.
- Check that the rope is not twisted and that it runs smoothly.
| Step | Description |
|---|---|
| 1 | Measure and cut the new rope |
| 2 | Attach the rope to the sash weight |
| 3 | Secure the rope to the sash |
Remember, the sash cords are vital for the window's operation. If they are not installed correctly, the window may not open or close properly.
By following these steps, you can successfully replace the sash cords and restore your window's functionality. Don’t forget to check the wrs 1-9/16" black sash cam, as it is essential for window functionality!
Reassembling and Testing the Window
Reinstalling the Sash into the Frame
Once you have replaced the sash cords, it’s time to put everything back together. Carefully lift the sash and place it back into the window frame. Make sure it fits snugly and aligns properly with the frame. A well-fitted sash will ensure smooth operation.
Reattaching the Window Stops
After the sash is in place, you need to reattach the window stops. These are the pieces that hold the sash in the frame. Use the following steps:
- Position the stops back into their original place.
- Secure them with screws or nails, depending on what was used before.
- Check that the stops are tight and do not allow any movement.
Testing the Window for Smooth Operation
Now that everything is back in place, it’s time to test the window. Open and close the sash several times to ensure it moves freely. If it feels stuck or heavy, you may need to adjust the cords or check the alignment again. Here’s a quick checklist for testing:
- Ensure the sash opens and closes easily.
- Check for any gaps or misalignments.
- Listen for any unusual noises that might indicate a problem.
Remember, a properly functioning window not only looks good but also helps with energy efficiency. Regular checks can prevent future issues.
| Test | Action | Result |
|---|---|---|
| Open the sash | Pull up gently | Should move smoothly |
| Close the sash | Push down gently | Should close without effort |
| Check for gaps | Inspect around the edges | No gaps should be visible |
Maintaining Your Restored Sash Windows
Regular Inspection and Maintenance Tips
To keep your sash windows in great shape, it’s important to check them regularly. Here are some tips:
- Look for any signs of wear on the sash cords and weights.
- Check for drafts around the window frame.
- Ensure the window opens and closes smoothly.
Dealing with Common Post-Repair Issues
After you’ve restored your windows, you might face some common problems. Here’s how to handle them:
- If the window sticks, check the alignment of the sash.
- For squeaky sounds, apply a little lubricant to the moving parts.
- If you notice gaps, consider adding weather stripping.
Enhancing Window Longevity with Proper Care
Taking care of your sash windows can help them last longer. Here are some ways to enhance their lifespan:
- Regularly clean the glass and frames to prevent dirt buildup.
- Inspect the sash cam for any damage; it’s essential for smooth operation.
- Keep the area around the window clear of debris.
Remember, consistent care can prevent bigger problems down the road!
Conclusion
In conclusion, fixing old windows with ropes is a great way to bring new life to your home. By following the steps outlined in this guide, you can easily replace worn-out sash cords and make your windows work like new again. Not only will this improve the look of your windows, but it will also help with energy efficiency. Remember, taking your time and being careful is key to a successful repair. With a little patience and effort, you can enjoy the benefits of your restored windows for years to come.
Frequently Asked Questions
What are sash windows?
Sash windows are a type of window that has two parts, or sashes, that slide up and down. They are often found in older buildings and can be very charming.
Why do sash cords need to be replaced?
Sash cords can wear out over time. When they break, the window can become hard to open or close. Replacing them helps the window work properly again.
How do I know if my sash cords are broken?
If your window feels heavy, won’t stay open, or makes noise when you try to move it, the sash cords might be broken or worn out.
Can I replace sash cords by myself?
Yes, you can replace sash cords on your own if you have the right tools and follow the steps carefully. Just make sure to take your time.
What tools do I need for this repair?
You will need a few basic tools like a screwdriver, a utility knife, and some new rope for the cords. Safety gear like gloves is also a good idea.
How can I maintain my sash windows after repair?
To keep your sash windows in good shape, check them regularly for any issues, clean them often, and make sure the cords are still working well.