How to Install Larson Storm Door Glass Panel: A Step-by-Step Guide for Homeowners
Installing a Larson storm door glass panel can be a straightforward project for homeowners looking to enhance their entryway. This guide will walk you through the steps needed to successfully install the glass panel, ensuring proper fit and function. With the right tools and a little patience, you can complete this task in no time, adding both beauty and efficiency to your home.
Key Takeaways
- Gather all necessary tools and materials before starting.
- Carefully remove the old panel and clean the door frame.
- Align the new glass panel correctly for a snug fit.
- Secure the panel using the provided clips to ensure stability.
- Regular maintenance will help prolong the life of your storm door.
Gathering Necessary Tools and Materials
Before you start installing your Larson storm door glass panel, it’s important to gather all the necessary tools and materials. Having everything ready will make the installation process smoother.
Essential Tools for Installation
To successfully install your storm door glass panel, you will need the following tools:
- Level: To ensure your door is straight.
- Tape Measure: For accurate measurements of your door frame.
- Screwdrivers: Both flathead and Phillips-head for various screws.
- Power Drill: For drilling holes and securing screws.
- Wood Shims: To adjust the fit of the door if necessary.
Choosing the Right Glass Panel
When selecting a glass panel, consider the following:
- Size: Measure your door frame carefully to ensure a proper fit.
- Type of Glass: Choose between clear, tinted, or low-E glass based on your needs.
- Durability: Look for panels that can withstand weather changes.
Safety Equipment and Precautions
Safety should always come first. Here are some essential safety items:
- Safety Glasses: Protect your eyes from debris.
- Gloves: To prevent cuts while handling glass.
- Dust Mask: If you’re working in a dusty environment.
Remember, taking the time to gather your tools and materials will save you time and effort during installation.
Additionally, don’t forget to have the wrs 5/16" offset aluminum storm door panel clips with screws - 8 pack on hand. These clips are essential for securing your panel and resisting rust and corrosion, ensuring a long-lasting installation.
Preparing Your Storm Door for Installation

Before you start installing your Larson storm door glass panel, it’s important to prepare your door properly. This ensures a smooth installation process and a better fit for your new panel.
Removing the Existing Panel
- Carefully take out the old panel from your storm door. This may involve unscrewing or unclipping it, depending on the model.
- Inspect the frame for any damage or wear that might need fixing before installing the new panel.
- Set the old panel aside in a safe place to avoid any damage.
Cleaning the Door Frame
- Use a damp cloth to wipe down the door frame, removing any dust or debris.
- Check for any rust or corrosion that may need treatment before installation.
- Ensure the frame is completely dry before proceeding to the next step.
Inspecting the Door Components
- Look over the hinges, latch, and any other hardware to ensure they are in good condition.
- If you notice any issues, consider upgrading to a more durable option like the wrs push button storm door latch assembly - black for better performance.
- Make sure everything is functioning properly to avoid problems after the new panel is installed.
Tip: Taking the time to prepare your storm door will save you headaches later on. A well-prepared door leads to a better fit and longer-lasting performance!
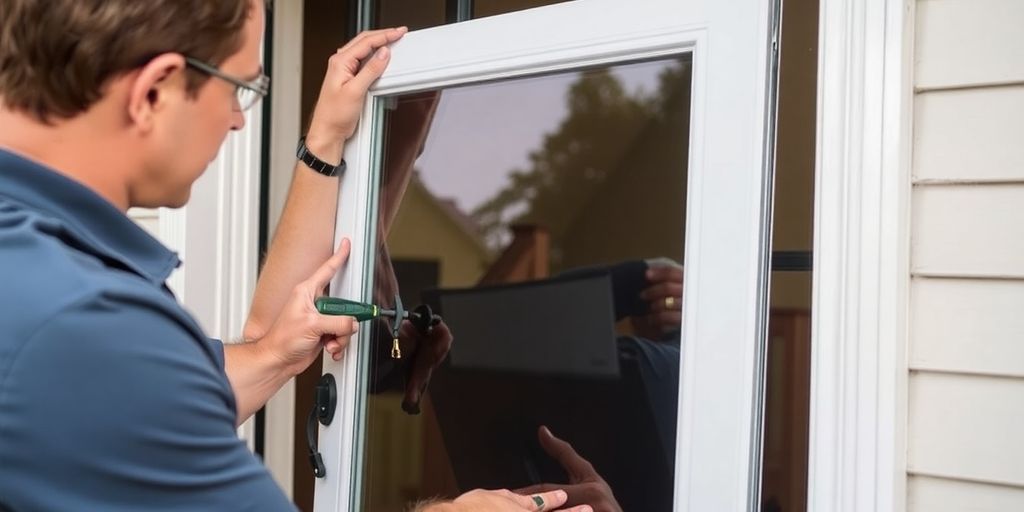
Installing the Larson Storm Door Glass Panel
Aligning the Glass Panel
To start, carefully position the glass panel into the frame of your storm door. Make sure it is centered and level. Proper alignment is crucial for a secure fit. You can use a level tool to check this.
Securing the Panel with Clips
Once the glass panel is aligned, it’s time to secure it. Use the wrs 1/8" offset aluminum storm door panel clips to hold the panel in place. These clips are designed for a secure fit and are resistant to rust and corrosion, making them perfect for all weather conditions. Here’s how to do it:
- Place the clips at the top and bottom of the panel.
- Tighten the screws to secure the clips firmly.
- Double-check that the panel is still aligned after securing.
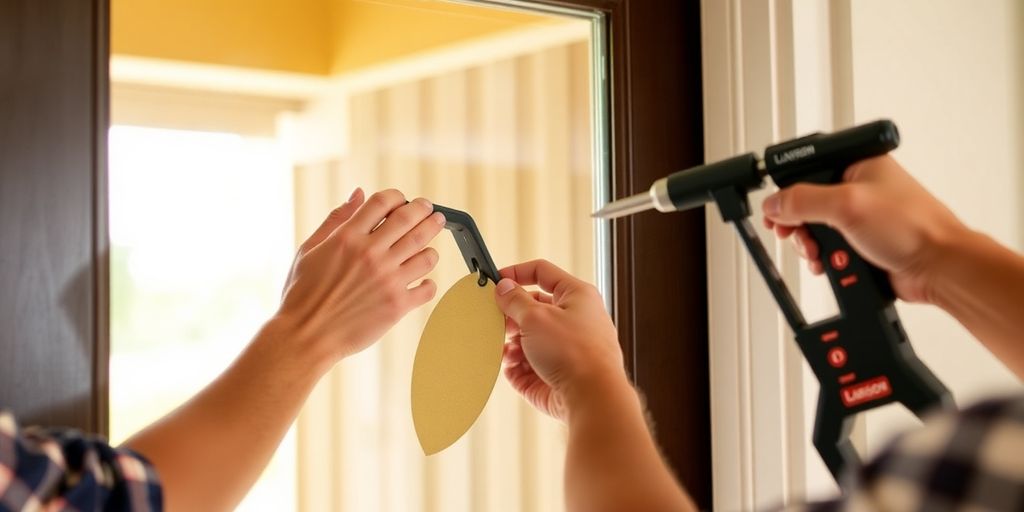
Ensuring Proper Fit and Seal
After securing the panel, inspect the edges to ensure there are no gaps. A good seal is important to keep out drafts and moisture. You can run your hand along the edges to feel for any air leaks. If you find any, consider adding weather stripping for extra protection.
Remember, a well-installed glass panel not only enhances the look of your storm door but also improves energy efficiency.
Adjusting and Testing the Installed Panel
Checking for Smooth Operation
After installing your Larson storm door glass panel, it’s important to ensure that it operates smoothly. Here are some steps to follow:
- Open and close the door several times to check for any sticking points.
- If you notice any resistance, inspect the hinges and adjust them as needed.
- Make sure the door swings freely without any obstructions.
Adjusting the Door Closer
The door closer is crucial for ensuring that your storm door closes properly. To adjust it:
- Locate the adjustment screw on the closer.
- Turn the screw clockwise to increase the closing speed or counterclockwise to slow it down.
- Test the door after each adjustment to find the right speed that works for you.
Testing the Lock and Handle
Finally, check the lock and handle to ensure they function correctly:
- Lock the door and then unlock it to ensure smooth operation.
- If the lock feels stiff, apply a small amount of lubricant to the mechanism.
- Ensure the handle is securely attached and operates without any issues.
Remember: Regular maintenance will help keep your storm door functioning well for years to come.
For securing the panel, consider using wrs 1/8" offset aluminum storm door panel clips with screws - 8 pack. These clips are rust-resistant and ideal for all weather conditions, ensuring your panel stays in place securely.
Maintenance Tips for Your Larson Storm Door
Regular Cleaning and Care
To keep your Larson storm door looking great, clean it regularly. Use a mild soap and water solution to wipe down the glass and frame. Avoid harsh chemicals that can damage the finish. Here are some tips:
- Clean the glass with a soft cloth to prevent scratches.
- Wipe down the frame to remove dirt and grime.
- Check for any signs of wear on the seals and replace them if necessary.
Inspecting for Wear and Tear
It's important to check your storm door for any signs of damage. Regular inspections can help you catch problems early. Look for:
- Cracks in the glass or frame.
- Loose hardware or hinges.
- Signs of rust or corrosion on metal parts.
Seasonal Adjustments and Checks
As the seasons change, your storm door may need some adjustments. Make sure to check these items:
- Adjust the door closer to ensure it closes smoothly.
- Inspect the weather stripping for any gaps.
- Test the lock and handle to ensure they function properly.
Keeping your storm door in good shape not only enhances its appearance but also improves its performance and longevity. Regular maintenance is key!
Final Thoughts on Installing Your Larson Storm Door
Installing a Larson storm door can be a rewarding project that enhances your home’s comfort and security. By following the steps outlined in this guide, you can successfully add a stylish and functional door to your entryway. Remember to take your time, gather all the necessary tools, and double-check your measurements. With a little patience and effort, you’ll enjoy the benefits of your new storm door for years to come. Whether it’s keeping out the weather or letting in fresh air, your new door will make a positive difference in your home.
Frequently Asked Questions
What tools do I need to install a Larson storm door glass panel?
To install a Larson storm door glass panel, you will need a drill, a Phillips-head screwdriver, safety glasses, and some screws. It's also helpful to have a measuring tape and a level.
How do I choose the right glass panel for my storm door?
When choosing a glass panel, make sure it fits your storm door's dimensions. Look for options that match your home's style and consider features like energy efficiency and UV protection.
Is it safe to install a storm door glass panel by myself?
Yes, installing a storm door glass panel can be done by most homeowners. Just follow the instructions carefully and take safety precautions, like wearing safety glasses.
How can I ensure my storm door glass panel fits properly?
To ensure a proper fit, measure your door frame accurately before purchasing the glass panel. Check the manufacturer's guidelines for specific measurements.
What should I do if my storm door glass panel is hard to open or close?
If the glass panel is hard to operate, check if it’s aligned correctly. You may need to adjust the door closer or the hinges to ensure smooth operation.
How do I maintain my Larson storm door glass panel?
Regularly clean the glass with a gentle cleaner and inspect the seals for wear. Make seasonal adjustments as needed to keep the door functioning well.