How to Replace a Window: A Step-by-Step Guide on YouTube
So, you’re thinking about swapping out those old windows, huh? Maybe they’re letting in drafts or just looking a bit tired. Whatever the reason, tackling a window replacement can be a great DIY project. But, like all things home improvement, it’s got its quirks. Lucky for you, YouTube is packed with guides to walk you through every step. From picking the right type of window to the final touches, there’s a video for it. Let’s dive into how you can get this done with a little help from the internet.
Key Takeaways
- Understand why you want to replace your windows and choose the right type.
- Gather all necessary tools and materials before starting the project.
- Measure your existing windows accurately to ensure a good fit for replacements.
- Follow safety protocols to prevent accidents during installation.
- Utilize YouTube tutorials for visual guidance and additional tips.
Understanding the Basics of Window Replacement
Why Replace Your Windows?
Replacing windows can be a game changer for your home. Old windows can be drafty and inefficient, leading to higher energy bills. By swapping them out, you not only improve your home's insulation but also its overall appearance. Plus, new windows can boost your property's value. So, whether it's for aesthetics, comfort, or economics, there's a good reason to consider an upgrade.
Types of Replacement Windows
When it comes to replacement windows, you've got options. Here's a quick rundown:
- Sash Kits: These are great if your existing frame is in good shape. They provide new movable parts like jamb liners and sashes.
- Insert Replacements: Also known as pocket windows, these come fully assembled and fit right into the existing frame. Just remember, they might slightly reduce the glass area.
- Full-Frame Units: If your current frame is beyond repair, this is your go-to. They replace everything down to the studs.
Each type has its unique benefits, so think about what suits your needs best.
Tools and Materials Needed
Before you start, it's important to gather everything you need:
- Measuring tape for getting dimensions right
- Pry bar and utility knife for removing old windows
- Hammer and nails or screws for securing the new window
- Level to ensure everything is straight
- Caulk and sealant for a tight finish
Having these tools on hand will make the job smoother and more efficient.
Taking the time to understand the basics of window replacement ensures you're well-prepared for the task ahead. It's not just about swapping out old for new; it's about enhancing your living space and making your home more energy-efficient.
Preparing for Window Replacement
Measuring Your Existing Windows
Before you even think about picking up a new window, grab your tape measure. Measuring your current window frame accurately is key. You'll want to measure the width from jamb to jamb at the top, middle, and bottom. Note the smallest number. Do the same for the height, measuring from the top of the sill to the underside of the head jamb. Again, jot down the smallest measurement. Check if the frame is square by measuring diagonally from corner to corner. If the numbers are off by more than a quarter-inch, you might need some adjustments or even a full-frame replacement.
Gathering Necessary Tools
Once you've got your measurements down, it's time to gather your tools. Here's a quick list of essentials:
- Tape measure
- Level
- Pry bar
- Hammer
- Screwdriver
- Caulk gun
- Utility knife
Having everything ready before you start will save you time and frustration. You don't want to be halfway through the job and realize you're missing something crucial.
Ensuring Safety During Installation
Safety first, folks! Before you dive into the installation, make sure you're protecting yourself. Wear gloves to protect your hands from sharp edges and safety glasses to keep your eyes safe from debris. If you're working on an upper floor, ensure you have a stable ladder and maybe even a buddy to help out. It's not just about getting the job done—it's about doing it safely.
Remember, taking the time to prepare properly can make the entire window replacement process smoother and more efficient.
Removing the Old Window

Taking Out the Sash
Alright, first things first—let's get that old sash out of the way. You know, the part that holds the glass and lets you open and close the window. Start by prying off or unscrewing the interior wooden stops to remove the lower sash. If you plan on reusing these stops, be extra careful because they can break easily. Next up, take out the parting beads to free the upper sash. If your windows have sash-replacement kits, you might not even have beads. Simply press in on the jamb liners and pull the top of the sash forward. Then, pivot one side of the sash upward to free it from the jamb liners.
Prying Off Jamb Liners
Once the sashes are out, it's time to deal with the jamb liners. If your window has vinyl or aluminum liners, use a flat bar to pry them free. For original windows, remove any remaining wooden stops from the frame, but leave the interior and exterior casings intact. This step is crucial for a clean removal.
Cleaning the Window Frame
Now that everything's out, take a moment to inspect the window frame. Check for any rot, termite damage, or other issues that might need addressing. Use a scraper to remove any loose or blistered paint. Fill any holes or cracks with exterior-grade wood putty, and let it dry. Once that's done, sand the jambs smooth. Finally, prime and paint the surfaces to prep them for the new window.
Taking your time with these steps can save you a lot of trouble down the line. A clean frame means a better fit for your new window, and less hassle when it comes to installation.
When you're ready to move on, make sure all debris is cleared away. This will make the next steps easier and keep your workspace tidy.
Installing the New Window
Dry Fitting the Replacement Window
So, you've got your new window ready to go. First things first, let's do a dry fit. This means placing the window into the opening without securing it, just to make sure everything lines up nicely. Grab a level and check that the window is straight and plumb. If it’s all good, you’re ready to move ahead. If not, adjust your shims until it is. Proper alignment is key to avoid any future headaches.
Securing the Window in Place
Now it’s time to secure that window. Start by applying a bead of caulk around the edges of the window opening. This helps seal out drafts and moisture. Next, fit the window back into place and use screws to fasten it. Make sure not to overtighten, as this can warp the frame. For a snug fit, use shims behind the jambs.
Make sure each screw is driven in just enough to hold the window securely without hindering its operation. If you're using a Caldwell Series 150 Spirex, ensure the balance system is correctly aligned to support the window’s weight.
Checking for Proper Operation
Once the window is in, it’s time to check if everything works smoothly. Open and close the window a few times to ensure it glides without a hitch. Check the locks and other hardware to make sure they’re functioning properly. If anything feels off, now’s the time to adjust it. A little tweak here and there can make a world of difference in how your window operates.
Finally, take a step back and admire your work. A properly installed window not only looks great but also boosts energy efficiency and security. And there you have it, your new window is all set!
Finishing Touches and Maintenance

Caulking and Sealing the Window
Alright, you've got your new window in place, but the job isn't done just yet. Caulking and sealing are crucial to keeping drafts and water out. Use a high-quality exterior caulk, preferably one with a 50-year lifespan, to ensure long-lasting protection. Here's a quick rundown:
- Apply caulk: Run a smooth bead of caulk around the window frame. Make sure to get it right the first time, as smoothing it out immediately is key to a neat finish.
- Check for gaps: If you notice any gaps larger than 1/4 inch, fill them with a foam backer rod before caulking.
- Seal it up: After applying the caulk, smooth it out with your finger or a caulk tool to ensure a tight seal.
Painting and Priming
Once the caulk has dried, it’s time to move on to painting and priming. This step not only enhances the appearance but also provides an extra layer of protection against the elements. Follow these steps:
- Primer first: Use a good primer on any exposed wood to prevent moisture from seeping in.
- Paint it up: Choose a paint that complements your home’s exterior. Apply at least two coats for durability.
- Inspect your work: After everything dries, check for any missed spots or uneven areas and touch them up as needed.
Regular Maintenance Tips
Keeping your windows in top shape requires a bit of regular maintenance. Here are some tips to help you out:
- Clean regularly: Use a mild detergent and water to clean the glass and frame. Avoid harsh chemicals that might damage the finish.
- Inspect seals: Check the caulking and weatherstripping annually to make sure they’re still intact and replace them if needed.
- Lubricate moving parts: A little silicone spray can go a long way in keeping your window hardware functioning smoothly.
Staying on top of these tasks not only extends the life of your windows but also keeps your home energy-efficient and looking sharp.
For those tricky installations or when things just don't seem right, consider checking out the WRS Die Cast Pivot Bar with Mini T-Shaped Head for a reliable solution to common window hardware issues.
Troubleshooting Common Issues
Dealing with Misaligned Windows
Misaligned windows can be a real pain. You might notice them sticking or refusing to close properly. This often happens because the window frame has shifted over time. To fix this, you can try adjusting the screws on the hinges or using a shim to level things out. If that doesn't help, it might be time to call in a pro.
Fixing Drafts and Leaks
Feeling a draft even with your windows shut tight? Check the seals around the window frame. Over time, weatherstripping can wear out or come loose, letting in cold air. Replacing the weatherstripping or using a bit of caulk can often solve the problem. If the glass itself is cracked or broken, a more involved repair might be necessary.
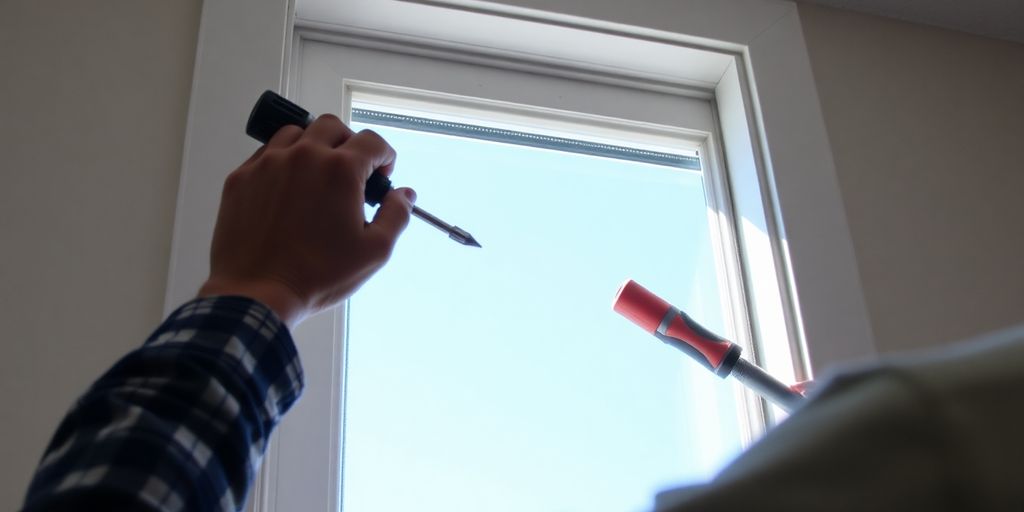
Adjusting Window Hardware
Sometimes, the hardware on your windows can get loose or break, causing issues with opening and closing. Tighten any loose screws and replace any broken parts. If you're dealing with a pivot bar, like the WRS Traco Pivot Bar, make sure it's properly aligned and secured. If you're not sure how to handle these repairs, there are plenty of tutorials online that can guide you through the process.
Remember, regular maintenance can prevent many of these issues from becoming bigger problems down the line. A little attention now can save a lot of hassle later.
Exploring Additional Resources on YouTube
Top YouTube Channels for Window Replacement
If you're looking to replace your windows and want some visual guidance, YouTube is a treasure trove of information. Some channels excel in breaking down complex tasks into easy-to-follow steps. Here are a few you might find helpful:
- This Old House: Known for its comprehensive home improvement videos, this channel covers everything from simple repairs to full-scale renovations.
- Home Repair Tutor: Offers short and engaging tutorials that are perfect for DIY enthusiasts.
- Fix This Build That: Focuses on woodworking and home improvement projects, providing clear instructions and practical tips.
Video Tutorials for Visual Learners
Video tutorials can be a game-changer, especially if you're a visual learner. They allow you to see each step in action, making it easier to understand the process. Here are some topics you might find useful:
- Step-by-Step Window Installation: Watch detailed guides on how to install various types of windows.
- Common Mistakes to Avoid: Learn about the pitfalls to steer clear of when replacing windows.
- Tool and Material Guides: Get insights into the tools and materials you'll need for a successful installation.
Community Tips and Tricks
The beauty of YouTube is the community aspect. Many creators and viewers share their own experiences and tips in the comments section. This can be a goldmine for additional advice and alternative methods. Engaging with the community can also provide encouragement and support as you tackle your window replacement project.
Watching videos on YouTube can make even the most daunting tasks seem manageable. With the right guidance and a bit of patience, you'll soon find yourself mastering the art of window replacement.
Wrapping It Up
So there you have it, folks. Replacing a window might seem like a big job, but with the right tools and a little patience, it's totally doable. Just remember to measure twice, cut once, and keep your workspace tidy. Watching a few YouTube videos can really help too, giving you a visual guide to follow along. If you hit a snag, don't sweat it—there's always a pro you can call. But if you do decide to tackle it yourself, you'll not only save some cash but also get that sweet satisfaction of a job well done. Happy renovating!
Frequently Asked Questions
What tools do I need to replace a window?
To replace a window, you will need a measuring tape, caulk gun, hammer, cordless drill, putty knife, utility knife, flat pry bar, and a paint scraper.
How do I measure a window for replacement?
Measure the width and height of your current window frame in three places each. Write down the smallest measurement for both. This helps ensure the replacement window fits properly.
Why should I replace my windows?
Replacing windows can improve energy efficiency, reduce noise, and enhance the look of your home. New windows can save you money on heating and cooling bills.
Can I replace windows myself, or should I hire a professional?
If you're handy and have the right tools, you can replace windows yourself. However, hiring a professional ensures the job is done correctly and safely.
What are common problems when replacing windows?
Common problems include misaligned windows, drafts, and leaks. Proper measurement and installation can help avoid these issues.
How do I maintain my new windows?
Regular cleaning, checking seals, and ensuring hardware works properly are key to maintaining your new windows. This helps them last longer and work efficiently.