
Mastering the Art of How to Weather Strip Door: A Comprehensive Guide for Homeowners
Ever felt that chilly draft sneaking in under your door? Or maybe you've noticed your energy bills creeping up? Weatherstripping might just be your new best friend. It's not just about keeping the cold out in winter or the heat out in summer. It's about making your home comfy and saving some bucks on those pesky energy bills. Dive into this guide and let's make your home cozier, one door at a time.
Key Takeaways
- Weatherstripping helps seal gaps around doors, keeping your home cozy and reducing energy bills.
- It's a simple DIY project that most homeowners can tackle with basic tools.
- Choosing the right type of weatherstripping is key for effectiveness and durability.
- Regular maintenance checks can prolong the life of your weatherstripping.
- Properly installed weatherstripping can save you up to 30% on energy costs.
Understanding The Importance Of Weatherstripping
What Is Weatherstripping?
Weatherstripping is basically the unsung hero of home comfort. It's that simple material you put around doors and windows to block those pesky drafts. Think of it like a cozy scarf for your house, keeping the cold air out in the winter and the cool air in during the summer. Without it, you're basically letting your money float away with the breeze.
Benefits Of Weatherstripping
So, why should you care about weatherstripping? Let's break it down:
- Save on Energy Bills: Who doesn't love saving money? Proper weatherstripping can cut your energy bills by up to 30%. That's a nice chunk of change back in your pocket.
- Comfort All Year Round: Keeps your home warmer in winter and cooler in summer. No more shivering in the living room or sweating bullets in the kitchen.
- Protection Against the Elements: It’s not just about temperature. Weatherstripping also shields your home from moisture and those little critters that try to sneak in.
Weatherstripping is a simple yet effective way to save on energy costs. By sealing off drafts and air leaks around doors and windows, it helps maintain a consistent indoor temperature.
Common Types Of Weatherstripping
When it comes to weatherstripping, you've got options. Here are a few common types:
- Foam Tape: This one’s a favorite because it’s super easy to install and doesn’t break the bank. Perfect for those smaller gaps.
- Vinyl or Rubber Strips: These are more durable and do a great job at sealing bigger gaps. Plus, they can handle a bit more wear and tear.
- Metal Weather Stripping: Ideal for doors that see a lot of action. It’s tough and long-lasting, perfect for high-traffic areas.
If you're looking for something specific like a T-Shaped Grey Vinyl Storm Door Sweep, it offers excellent protection against drafts and dust, enhancing energy efficiency while matching your door's style.
Preparing Your Door For Weatherstripping
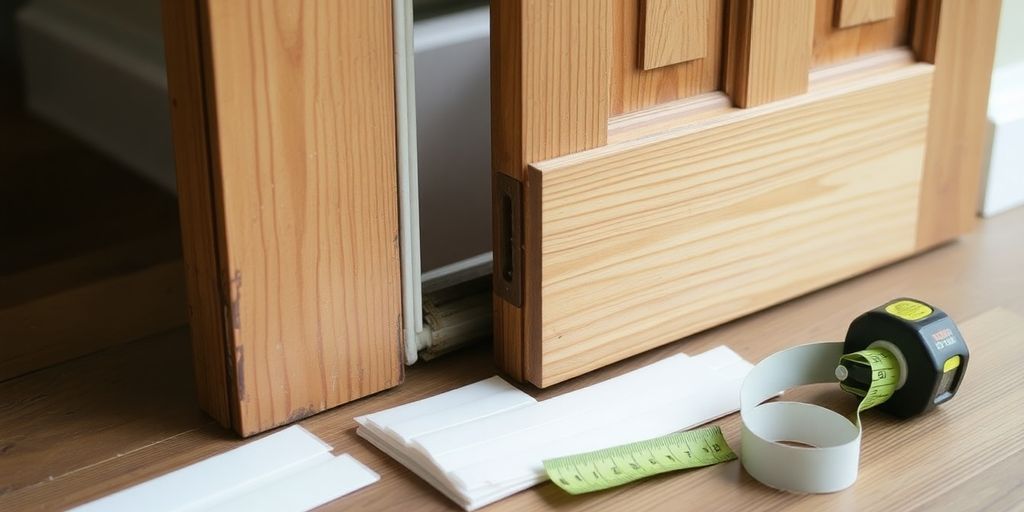
Getting your door ready for weatherstripping is a crucial step that can make or break your project. Proper preparation ensures that the weatherstripping will adhere well and function effectively. Here's how to get your door in prime condition:
Gathering Necessary Tools And Materials
Before diving into the installation, gather all the tools and materials you'll need:
- Measuring tape
- Scissors or utility knife
- Adhesive-backed weather strips
- Cleaning supplies (soap, water, and a cloth)
- An optional helper for those tricky spots
Having everything on hand will save you from unnecessary interruptions once you start.
Cleaning The Door Surface
A clean surface is essential for a good seal. Dirt and grime can prevent the weatherstripping from sticking properly. Use soap and water to scrub the area where you'll apply the strips. Make sure it's completely dry before moving on to the next step.
Measuring The Door
Accurate measurements are key to ensuring a snug fit. Measure the length of the door where you plan to install the weather strips. Double-check your measurements to avoid cutting the strips too short or too long.
Taking the time to clean and measure thoroughly will save you a lot of headaches later on. A well-prepared door will make the installation process smoother and more effective.
By following these steps, you'll be ready to install your weatherstripping effectively, ensuring a snug fit that keeps drafts out and comfort in. Remember, using quality materials like the Marvin Beige Top Jamb Weatherstripping can enhance durability and security, making your door even more efficient!
Step-By-Step Guide To Weatherstripping A Door
Cutting The Weather Strips
Alright, let's dive into the nitty-gritty of cutting those weather strips. First off, grab a measuring tape and get the exact length of the door edges where the strips will go. Accuracy here is key. Once you've got your measurements, take a pair of scissors or a utility knife and cut the weather strips to the right lengths. Make sure your cuts are straight, as this ensures a snug fit. If you're using something like the WRS 1-1/2" x 3" Surface Mounted Guide, ensure you have enough clips or guides for your project.
Applying The Weather Strips
Now, onto applying those strips. Start by cleaning the area where they'll stick. Use some soap and water, and make sure it's completely dry. Next, peel back a bit of the adhesive backing from the weather strip and firmly press it onto the door frame. Do this a few inches at a time to ensure a tight seal. This method helps in achieving a seamless application.
Checking The Fit And Adjustments
Finally, you need to check how well the strips fit. Close the door to see if the strips are doing their job without hindering the door's movement. If the door doesn't shut smoothly, you might need to make some adjustments or trim the strips a little more. Regularly inspect the strips to ensure they stay effective and replace them if they show any signs of wear.
Proper installation of weather strips can significantly boost your home's energy efficiency, keeping drafts at bay and comfort in check.
Choosing The Right Weatherstripping For Your Door
Types Of Weatherstripping Materials
When it comes to weatherstripping your door, picking the right material is key. Different types of weatherstripping materials offer various benefits, so you'll want to choose one that fits your needs. Here's a quick rundown:
- Adhesive-backed foam: This is super easy to install and works great for sealing small gaps around doors and windows.
- V-strip (tension seal): Ideal for door and window frames, this type provides a tight seal and is pretty flexible.
- Door sweeps: These are perfect for sealing the gap at the bottom of your doors. For instance, the WRS grey vinyl storm door sweep is known for its durability and ease of installation.
- Fin seal: Often used in sliding windows and doors, this offers superior weather protection.
Factors To Consider When Buying
Choosing the right weatherstripping involves a few considerations:
- Material: Different materials provide different levels of durability and insulation. Consider what will work best for your climate.
- Size: Make sure the weather strip fits the gap you need to seal. Measure twice to avoid mistakes.
- Ease of installation: Some weather strips are simpler to install than others. Consider your DIY skills when selecting.
- Cost: Prices can vary widely, so pick one that fits your budget without compromising quality.
Where To Purchase Quality Weatherstripping
You can find quality weatherstripping at many retailers, both online and in-store. Here are some popular options:
- Amazon: Offers a wide selection and the convenience of home delivery.
- Home Depot: Known for a variety of weather strips and expert advice.
- Lowe's: Another great spot for quality weather strips.
- Walmart: Provides affordable options available both online and in-store.
Before purchasing, always measure the gaps you need to seal to ensure a proper fit. This simple step can save you time and ensure your home stays energy-efficient.
Maintaining And Replacing Weatherstripping

Signs Your Weatherstripping Needs Replacement
Knowing when to replace your weatherstripping is key to keeping your home energy-efficient. Look out for these signs:
- Visible cracks or tears: These are clear indicators that the material is worn out.
- Difficulty closing doors or windows: If they don't shut as smoothly as before, it's time for a check.
- Drafts or air leaks around the edges: Feel a breeze? That's a sign your weatherstripping isn't doing its job.
- Increased energy bills: A sudden spike might mean your home isn't as sealed as it should be.
How To Properly Maintain Weatherstripping
Regular upkeep can extend the life of your weatherstripping. Here's how:
- Inspect it at least once a year. Catching issues early can prevent bigger problems.
- Clean with mild soap and water to remove dirt and debris. A clean surface ensures a good seal.
- Apply a silicone-based lubricant to keep it flexible and effective.
- Address any signs of wear and tear promptly. Don't wait until it's too late.
Keeping your weatherstripping in good shape not only saves money on energy bills but also makes your home more comfortable.
Cost-Effective Replacement Options
When replacement is necessary, consider these affordable choices:
- Pressure-sensitive foam: It's easy to install and cheap, but might need frequent changes.
- Vinyl or rubber strips: These are durable and great for sealing gaps effectively.
- Metal weather stripping: Ideal for high-traffic areas like doors, offering robust protection.
For more specialized needs, like securing storm door panels, consider using products such as the WRS 1/8" Offset Aluminum Storm Door Panel Clips. They offer a reliable option for various door hardware needs.
Avoiding Common Mistakes In Weatherstripping
Weatherstripping is a fantastic way to keep your home cozy and cut down on those pesky energy bills. But, it’s easy to slip up if you’re not careful. Here’s how to dodge the most common pitfalls.
Skipping The Cleaning Step
Don’t underestimate the power of a clean surface. Before you slap on any weather strips, make sure the door frame is squeaky clean. Dirt and grime can stop the adhesive from sticking properly, leading to gaps and drafts. Grab some soap and water, give it a good scrub, and let it dry completely. A clean start is a strong start!
Incorrect Measurements
Measuring is one of those things you just can’t rush. Take the time to measure twice, even if you feel like you’ve got it right the first time. Cutting the weather strips to the wrong size can mean wasted materials and a lot of frustration. So, pull out that measuring tape and double-check your numbers.
Not Checking The Fit
Once you’ve got everything in place, don’t just walk away. Close the door and see how it feels. Does it shut smoothly? If not, you might need to make some tweaks. The strips shouldn’t block the door from closing, but they should be snug enough to keep drafts at bay. Adjust as needed to get that perfect fit.
By avoiding these simple mistakes, you can make sure your weatherstripping does its job, keeping your home comfortable and your energy bills low.
For those looking to upgrade their weatherstripping, consider the Marvin Beige Top Jamb Weatherstripping for a snug fit that seals out drafts effectively. It's a great choice for anyone looking to enhance their home's comfort and efficiency.
Maximizing Energy Efficiency With Weatherstripping
How Weatherstripping Reduces Energy Bills
Weatherstripping is like a secret weapon against high energy bills. By sealing gaps around doors and windows, you keep the warm air in during winter and the hot air out in summer. This means your heating and cooling systems don't have to work as hard, saving you money. Properly installed weather strips can slash energy bills by up to 30%. That's some serious savings!
Combining Weatherstripping With Other Insulation Methods
Want to boost your home's energy efficiency even more? Pair weatherstripping with other insulation tactics. Here are a few ideas:
- Use caulk to seal those pesky smaller gaps.
- Beef up your attic and wall insulation.
- Install door sweeps like the WRS Grey Vinyl Storm Door Sweep for top-notch insulation.
Real-World Examples Of Energy Savings
Plenty of folks have seen big savings after weatherstripping. Take the family in Ohio who cut their heating bills by 25% in the winter. Or the homeowner in Texas who saw a 20% drop in cooling costs during those scorching summer months.
Sealing your home properly can save you up to 20% on your energy bills. It's a smart move for any homeowner.
Wrapping It Up: Your Weatherstripping Journey
So there you have it, folks. Weatherstripping your doors isn't rocket science, but it sure can make a big difference in your home. By sealing those pesky gaps, you're not just keeping the drafts out—you're also saving on those energy bills. Plus, your home feels cozier, whether it's the dead of winter or the height of summer. Just remember to pick the right materials, measure twice, and keep an eye on your handiwork over time. It's a small investment of time and effort that pays off in comfort and savings. So go ahead, give it a try, and enjoy a snugger, more efficient home.
Frequently Asked Questions
What is weatherstripping?
Weatherstripping is a material used to seal gaps around doors and windows. It helps keep your home warm in winter and cool in summer by blocking drafts.
How does weatherstripping save energy?
By sealing off air leaks, weatherstripping reduces the amount of energy needed to heat or cool your home. This can lead to lower energy bills, sometimes by as much as 30%.
Can I install weatherstripping myself?
Yes! Installing weatherstripping is an easy do-it-yourself project. You can find all the materials you need at your local hardware store and follow simple instructions.
How often should I check my weatherstripping?
It's a good idea to check your weatherstripping at least once a year. If you see any wear or damage, it's time to replace it.
What types of weatherstripping are available?
There are several types, like adhesive foam, door sweeps, and V-strips. Each type works best for different gaps and needs.
Where can I buy weatherstripping?
You can find weatherstripping at places like Home Depot, Lowe's, Walmart, and online retailers like Amazon.