Revitalize Your Home: A Step-by-Step Guide on How to Reglaze Old Windows
Reglazing old windows is a fantastic way to enhance your home's comfort and energy efficiency. It might seem a bit daunting at first, but with the right tools and a little patience, you can do it yourself. This guide will walk you through the importance of reglazing, the tools you'll need, and a step-by-step process to get it done. Let's breathe new life into those old windows!
Key Takeaways
- Reglazing can save money compared to full window replacement.
- Old windows can lose their seal, leading to drafts and higher energy bills.
- Using the right tools and materials is crucial for a successful reglazing job.
- Common mistakes include rushing the process and not preparing the window properly.
- Regular maintenance can extend the life of your reglazed windows.
Understanding the Importance of Reglazing Old Windows

Reglazing old windows is a crucial step for homeowners looking to maintain their property. It not only enhances the appearance of your home but also improves energy efficiency. Here are some key reasons to consider reglazing:
Benefits of Reglazing Over Replacement
- Cost-effective: Reglazing is often cheaper than replacing entire windows.
- Preserves character: It helps maintain the original charm of older homes.
- Less waste: Reduces the amount of material sent to landfills.
Common Issues with Old Window Glazing
Old windows can face several problems, including:
- Cracked glass: This can lead to security risks and energy loss.
- Loose glazing: Deteriorating glazing can cause drafts, making your home uncomfortable.
- Aged putty: Old putty can become brittle and discolored, affecting both appearance and efficiency.
How Reglazing Enhances Energy Efficiency
Reglazing can significantly improve your windows' performance by:
- Sealing gaps that allow drafts.
- Reducing heating and cooling costs.
- Using products like the wrs milestone white snap-in glazing, which provides a secure seal and enhances energy efficiency.
Reglazing is not just a repair; it’s an investment in your home’s future. Regular maintenance can save you money and keep your home comfortable for years to come.
Essential Tools and Materials for Reglazing
Before you start reglazing your old windows, it’s crucial to gather all the necessary tools and materials. This preparation will help make the process smoother and more efficient.
Must-Have Tools for the Job
Here’s a list of essential tools you’ll need:
- Putty knife: For applying and smoothing the glazing compound.
- Heat gun: To soften old glazing for easier removal.
- Glass cutter: If you need to replace broken glass.
- Wire brush: For cleaning the window sash.
- Safety gear: Such as leather gloves and eye protection.
Choosing the Right Glazing Compound
Selecting the right glazing compound is vital for a successful reglazing job. Consider using:
- Oil-based glazing putty: This is durable and provides a strong seal.
- Acrylic latex caulk: Good for sealing gaps and ensuring energy efficiency.
- WRS milestone white snap-in glazing - 6 ft stick: This durable, easy-to-install solution is perfect for securing glass panes in window frames. Priced at $26.02, it enhances energy efficiency and aesthetics, making it ideal for replacing old glazing.
Safety Gear and Precautions
Your safety is the top priority. Here are some precautions to take:
- Always wear leather gloves to protect your hands.
- Use eye protection to shield against flying debris.
- Be cautious of lead paint if your windows are older than 1978.
Remember: Having the right tools and materials ready will make your reglazing project much easier and more enjoyable!
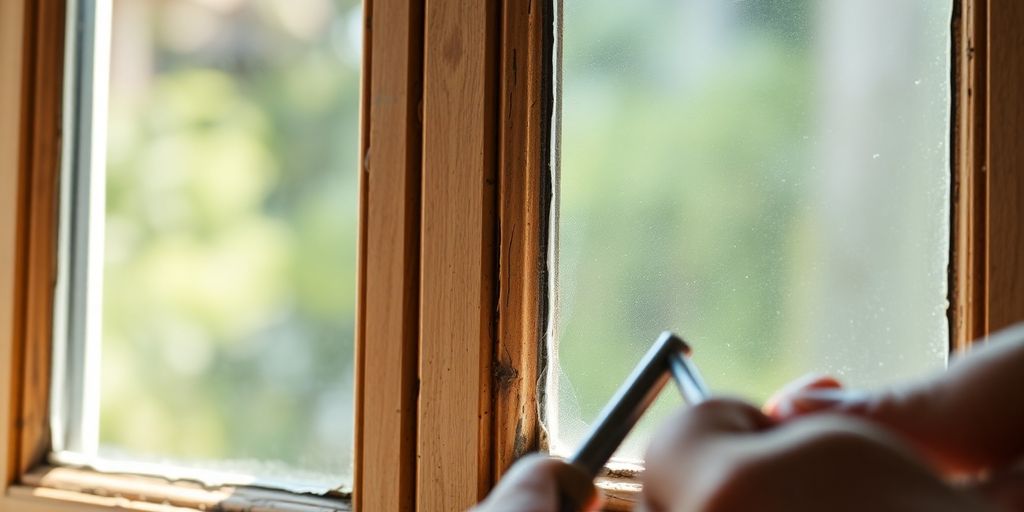
Step-by-Step Guide to Reglazing Old Windows
Reglazing old windows can seem tricky, but with the right steps, you can do it yourself! Here’s how:
Preparing the Window Frame
- Safety First: Always wear gloves and eye protection. This keeps you safe from sharp tools and old glass.
- Clean the window frame thoroughly. Use a wire brush to remove any loose paint or dirt.
- Make sure the frame is dry before you start working on it.
Removing Old Glazing and Glass
- Use a heat gun to soften the old glazing. This makes it easier to remove.
- Carefully pry off the old glazing with a putty knife. Be gentle to avoid breaking the glass.
- If the glass is cracked or broken, remove it carefully and replace it with new glass panes.
Applying New Glazing Compound
- Once the old glazing is removed, apply a new glazing compound. This is where the wrs white snap-in glazing bead - 6 ft stick comes in handy. It helps secure the glass and gives a nice finish.
- Smooth the new compound with your fingers or a putty knife to create an even surface.
- Allow the compound to dry completely before painting over it. This usually takes a few days.
Remember, taking your time and being careful will lead to a better finish!
Tips and Tricks for a Professional Finish

Avoiding Common Reglazing Mistakes
- Take your time when removing old glazing to avoid damaging the window frame.
- Ensure the glass is clean and free of dust before applying new glazing compound.
- Use the right amount of glazing compound; too much can create a messy finish.
Ensuring a Smooth and Even Glaze
- Apply the glazing compound in thin layers for better control.
- Use a putty knife to smooth out the compound, making sure to angle it correctly.
- Check for any bubbles or imperfections and fix them immediately.
Proper Drying and Curing Techniques
- Allow the glazing to dry completely before painting, usually 7-14 days.
- Keep the area well-ventilated to help the drying process.
- Avoid exposing the newly glazed windows to moisture until fully cured.
Remember, patience is key to achieving a professional-looking finish. Rushing through the process can lead to mistakes that are hard to fix.
For a secure and weather-tight seal, consider using the wrs white snap-in glazing bead - 3 ft stick. This durable component not only enhances the aesthetics of your windows but also ensures reliability across various window styles.
Maintaining Your Reglazed Windows
Regular Inspection and Upkeep
To keep your reglazed windows in top shape, it’s important to regularly check them. Here are some key points to consider:
- Look for cracks or chips in the glazing compound.
- Check for any signs of drafts around the edges.
- Ensure that the glass is securely in place and not loose.
Addressing Minor Repairs Promptly
If you notice any issues, it’s best to fix them right away. Here’s what you can do:
- Fill in small cracks with additional glazing compound.
- Replace any damaged glazing points to secure the glass.
- Touch up paint around the window frame to prevent moisture damage.
When to Consider Professional Help
Sometimes, you might need a professional to help maintain your windows. Consider this if:
- The damage is extensive and beyond a simple fix.
- You’re unsure about handling lead paint safely.
- You want to ensure a perfect finish and long-lasting results.
Regular maintenance is key to ensuring your windows last for years. Keeping an eye on your reglazed windows will help you catch problems early and maintain their beauty and efficiency.
For a durable finish, consider using products like the wrs white glazing bead - 6 ft stick. This component is designed to create a tight seal between the glass and frame, enhancing both insulation and aesthetics. It’s easy to install and priced at $12.23, making it a great choice for your window projects.
DIY vs. Professional Reglazing: Making the Right Choice
Deciding whether to reglaze your windows yourself or hire a professional can be a tough choice. Here’s a breakdown of the pros and cons to help you make the best decision for your situation.
Pros and Cons of DIY Reglazing
- Cost-Effective: DIY reglazing can save you money on labor costs.
- Learning Experience: It’s a great way to learn new skills and take pride in your work.
- Time-Consuming: It may take longer if you’re not experienced.
Pros and Cons of Professional Reglazing
- Guaranteed Quality: Professionals ensure a high-quality finish and proper installation.
- Time-Saving: They can complete the job quickly and efficiently.
- Higher Cost: Hiring a professional can be more expensive upfront.
| Feature | DIY Reglazing | Professional Reglazing |
|---|---|---|
| Cost | Potentially lower cost | Higher upfront cost |
| Time Commitment | Requires significant time | Completion in a short time |
| Skill Level | Basic carpentry skills needed | No specific skills required |
| Safety | Requires careful safety measures | Professionals handle safety |
| Results | Varies by experience | Guaranteed quality |
In summary, if you have the time and skills, DIY reglazing can be rewarding. However, for a guaranteed outcome and less hassle, hiring a professional is often the best choice.
Conclusion
Ultimately, the choice between DIY and professional reglazing depends on your comfort level with the task, your budget, and the condition of your windows. If you decide to go the DIY route, make sure to use quality materials like the wrs 1/8" x 1/2" double sided glazing tape, which can enhance your project’s success. If you’re unsure, don’t hesitate to reach out to a professional for advice or assistance!
Final Thoughts on Reglazing Your Windows
Reglazing your old windows can truly breathe new life into your home. Not only does it help keep your house cozy by stopping drafts, but it also makes your windows look great again. While the process might seem tricky at first, with a little practice and the right tools, you can do it yourself! Remember to take your time and follow the steps carefully. If you ever feel unsure, don’t hesitate to ask for help from a professional. In the end, reglazing is a smart way to save energy and maintain the charm of your home.
Frequently Asked Questions
What is reglazing and why is it important?
Reglazing is the process of replacing the old putty and securing the glass in a window. It's important because it helps fix drafts and keeps your home comfortable.
Can I reglaze my windows myself?
Yes, you can reglaze your windows yourself! With the right tools and a little practice, you can do it.
What tools do I need for reglazing?
You'll need a putty knife, a heat gun, gloves, and a few other basic tools to reglaze your windows.
How long does reglazing take?
Reglazing can take a few hours, but you should allow time for the putty to dry properly before painting.
Is reglazing better than replacing windows?
Reglazing is often cheaper and can improve energy efficiency without the need for full replacement.
When should I consider hiring a professional for reglazing?
If your windows have serious damage or if you're unsure about doing it yourself, it's best to hire a professional.