Step-by-Step Guide: How to Replace Weather Stripping on a Door for Optimal Insulation
If you're looking to improve your home's insulation, replacing the weather stripping on your door is a great place to start. Weather stripping helps keep out drafts, moisture, and noise, making your living space more comfortable and energy-efficient. This guide will take you through the steps to successfully replace your door's weather stripping, ensuring a snug fit and optimal insulation.
Key Takeaways
- Inspect the door frame for damage before removing old weather stripping.
- Measure carefully to ensure the new weather stripping fits well.
- Choose the right type of weather stripping for your door material.
- Seal any gaps with caulk to enhance insulation effectiveness.
- Regularly check and maintain weather stripping for best performance.
Gathering Necessary Tools and Materials
Selecting the Right Type of Weather Stripping
Alright, before you dive in, you gotta pick the right weather stripping for your door. There are a few types out there:
- V Strip (or Tension Seal): This one's a durable strip that forms a 'V' shape. It's good for doors and windows.
- Felt: Comes in rolls, cheap, and works well around door frames.
- Foam Tape: Sticky and flexible, great for odd-sized gaps.
- Door Sweeps: These go at the bottom of doors to block drafts.
Choosing the right one depends on what gaps you need to fill. Make sure it fits your door style and size.
Essential Tools for the Job
Here's what you'll need to get started:
- Screwdriver: For screws, obviously.
- Utility Knife: Handy for cutting the new seal.
- Tape Measure: Measure twice, cut once, right?
- Cleaning Supplies: A cloth and some cleaner to prep the area.
- Optional: Wood filler or sandpaper if your doorframe needs a little TLC.
Safety Gear and Precautions
Safety first, folks! Get yourself:
- Safety Goggles: Protect those peepers.
- Gloves: Keeps your hands safe and clean.
Remember, taking the time to gather everything beforehand saves you from running around mid-project. Plus, it keeps the frustration levels down. Trust me, it's worth it.
Removing Old Weather Stripping

Inspecting the Door Frame for Damage
Start by giving the door frame a good look-over. Check for any cracks, rot, or damage. You don't want to slap new weather stripping on a messed-up frame. If you spot any issues, fix them up before moving on.
Safely Detaching Old Weather Stripping
Next, grab a utility knife or a 5-in-1 tool to carefully peel off the old weather stripping. Be gentle so you don't mess up the door frame. Take your time with this step; rushing could lead to more work later.
Cleaning and Preparing the Surface
Once the old stuff is off, clean the door frame. Get rid of any dirt, leftover adhesive, or gunk. A smooth surface helps the new weather stripping stick better. You might want to sand it down a bit with 100-grit sandpaper for a perfect finish.
Prepping the door frame properly ensures the new weather stripping does its job right. It's all about making sure everything fits snugly and keeps the drafts out.
Measuring and Cutting New Weather Stripping
Accurate Measurement Techniques
Alright, so first things first, you gotta measure the doorframe. Grab a measuring tape and make sure it's flat and straight. You don’t want any wonky measurements. Measure the length and width of the doorframe, and if your doorframe looks a bit off, take a couple of measurements. Better safe than sorry, right? Also, jot down these numbers or keep a note somewhere. They’re gonna come in handy when you head out to buy your weather stripping.
Choosing the Right Cutting Tools
Now, onto cutting. You’ll need something sharp like a utility knife or some decent scissors. "Measure twice, cut once," is the golden rule here. Double-check your measurements before you start snipping away. Make sure your cuts are straight because if they’re not, the weather stripping won’t fit right. And remember, it’s easier to trim off a bit more than to add length if you cut it too short.
Ensuring a Proper Fit
Once you've got your pieces cut, try them out on the doorframe before sticking them down. Just place them in the groove where the old weather stripping was. You might need to make a few tweaks, but that’s cool. It’s better to adjust now than to be stuck with gaps later. And don’t forget, when in doubt, go a bit longer with the strips. You can always trim them down, but you can't make them longer once they're cut.
Installing New Weather Stripping

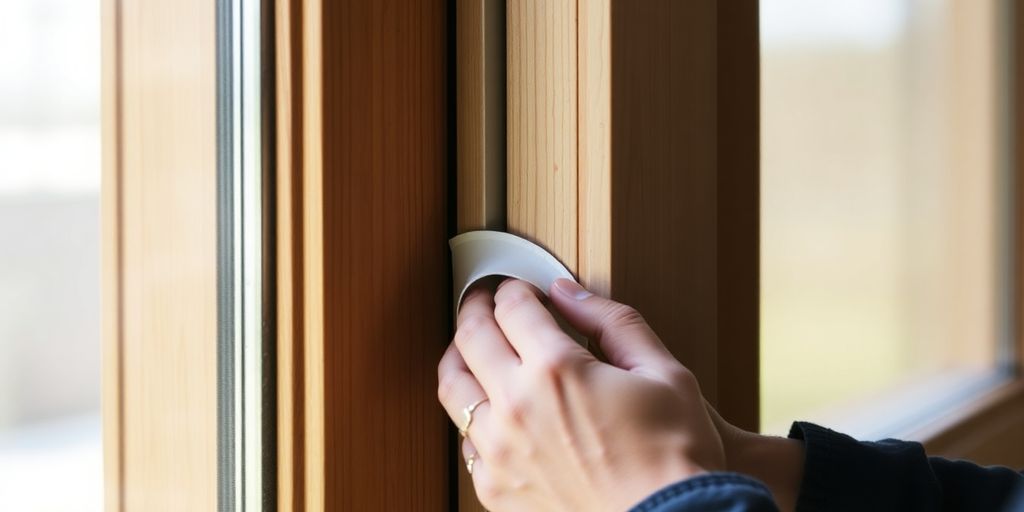
Applying Adhesive-Backed Strips
Alright, let's dive into getting that new weather stripping up. First thing, make sure everything's clean. Dirt or grime will mess with the adhesive. Test-fit the strip before you peel anything. Just press it in place, see if it fits. If it’s all good, peel the backing and stick it on. Start from the top and work your way down the sides. Press down firmly so it sticks well.
Securing with Nails or Screws
Sometimes, adhesive isn't enough, especially if your door gets a lot of use. That's where nails or screws come in. Grab your drill and some 1-inch nails or screws. Just gently secure the strip without squishing it too tight. Do this for the sides and the top of the door. Make sure it’s snug but not too tight.
Testing the Seal for Effectiveness
Now, let's see if this thing actually works. Close the door and look for any light coming through. Feel for drafts with your hand. If you spot any gaps, you might need to add more stripping or adjust what you’ve got. You can even use a piece of paper—if you can slide it through, there's a gap. Fix any issues now so you’re not dealing with drafts later.
A good seal means no drafts and a warmer home. Take your time to get it right.
Sealing and Final Adjustments
Identifying and Sealing Gaps
Alright, so you've got the new weather stripping in place, but don't kick back just yet. It's time to hunt for any sneaky gaps. Run your fingers around the door frame to feel for drafts or look for light peeking through. If you spot any gaps, grab some exterior-grade caulk and fill them in. Use a caulking gun to apply it, then smooth it out with a damp cloth or your finger. Let it dry completely before opening and closing the door again.
Adjusting for Seasonal Changes
Weather changes can mess with your weather stripping. As the temperature shifts, materials might expand or shrink. So, keep an eye on things as the seasons change. If you notice the door's harder to close or drafts creeping in, it might be time to adjust or replace the weather stripping. It's a good idea to check it a couple of times a year to stay ahead of any issues.
Ensuring Smooth Door Operation
Once everything's sealed up, make sure your door swings open and shut without a hitch. Open and close it a few times to check. If it's sticking or feels off, the weather stripping might be too thick or misaligned. Adjust it until the door operates smoothly.
A well-sealed door keeps your home cozy and your energy bills down. Regular checks and tweaks can save you from bigger headaches down the road.
Maintenance Tips for Longevity
Regular Cleaning and Inspection
Keeping your weather stripping clean is a no-brainer. Just grab a damp cloth and wipe away any dirt or dust. Inspect it regularly for any signs of wear and tear like cracks or peeling. If something looks off, it's time to replace that section.
Replacing Worn-Out Sections
When you spot any damaged parts, don't wait around. Swap them out pronto to keep your door sealed tight. This way, you avoid drafts and keep your home cozy.
Protecting Against Moisture
If your door gets a lot of rain or moisture, think about using a waterproof sealant on your weather stripping. It adds a layer of protection and helps it last longer.
Regular upkeep of your weather stripping means a snugger fit and better insulation. Don't skip on the maintenance, and your home will thank you with lower energy bills.
Final Thoughts on Replacing Weather Stripping
In conclusion, you've successfully replaced the weather stripping on your door, which is a great step toward making your home more comfortable and energy-efficient. Properly installed weather stripping helps keep out drafts and moisture, saving you money on energy bills. Remember to check your weather stripping regularly for any signs of wear and tear, and replace it when needed. By taking care of this simple task, you can enjoy a cozier home and a more efficient living space. Great job on completing your home improvement project!
Frequently Asked Questions
What is weather stripping and why is it important?
Weather stripping is a material used to seal gaps around doors and windows. It helps keep out drafts, moisture, and noise, making your home more comfortable and energy-efficient.
How do I know if I need to replace my weather stripping?
Check for signs of wear like cracks, gaps, or peeling. If you feel drafts around your door or see light coming through, it's time to replace it.
What tools do I need to replace weather stripping?
You will need a utility knife, measuring tape, a caulk gun, screws or nails, and safety gear like gloves and goggles.
Can I install weather stripping myself?
Yes! Replacing weather stripping is a simple DIY project that most people can do with basic tools and a little time.
How do I maintain my weather stripping?
Keep it clean by wiping it down regularly and check for wear and tear at least once a year. Replace any damaged parts to keep it effective.
What type of weather stripping should I use for my door?
The type of weather stripping you need depends on your door material. Foam tape works well for wooden doors, while rubber or vinyl is better for metal doors.