The Ultimate Guide on How to Replace a Vinyl Window Like a Pro
Replacing a vinyl window might seem tough, but with the right steps and tools, you can do it like a pro. This guide will help you understand the different types of vinyl windows, the tools you'll need, and the steps to take for a smooth replacement process. Whether you're considering a DIY project or hiring a professional, we've got you covered with essential tips and tricks to make the task easier.
Key Takeaways
- Vinyl windows come in various styles and have many advantages, such as being energy-efficient and low maintenance.
- Before starting, gather all the necessary tools and materials to ensure a smooth replacement process.
- Carefully measure your window opening to make sure the new window fits perfectly.
- Follow a step-by-step process to install the new window, ensuring proper sealing and alignment.
- Regular cleaning and maintenance of your new window will help it last longer and look great.
Understanding Vinyl Windows

Vinyl windows are a popular choice for many homeowners due to their durability and low maintenance. They come in various styles and can fit almost any home design. Here’s a closer look at the different aspects of vinyl windows:
Types of Vinyl Windows
There are several types of vinyl windows available:
- Single-hung windows: Only the bottom sash moves.
- Double-hung windows: Both sashes can move up and down.
- Casement windows: Hinged on one side and open outward.
- Sliding windows: Open by sliding to the side.
Benefits of Vinyl Windows
Vinyl windows offer numerous advantages:
- Energy efficiency: They help keep your home warm in winter and cool in summer.
- Low maintenance: They don’t need painting or staining.
- Cost-effective: Generally, they are less expensive than wood or aluminum windows.
Common Issues with Vinyl Windows
While vinyl windows are great, they can have some problems:
- Warping: Extreme heat can cause them to bend.
- Fading: Over time, colors may fade due to sun exposure.
- Seal failure: This can lead to condensation between the panes.
Vinyl windows are a smart investment for your home, combining style, efficiency, and ease of care.
For installation, using the right materials is crucial. For example, consider using wrs 1/8" x 1/2" double sided glazing tape for sealing. This tape is weather-resistant and ideal for windows, ensuring a tight fit and preventing leaks.
Essential Tools and Materials
Must-Have Tools for Replacement
To successfully replace a vinyl window, you will need the right tools. Here’s a list of essential tools:
- Measuring tape: For accurate measurements of the window opening.
- Screwdriver set: To remove screws from the old window.
- Utility knife: For cutting through caulk and other materials.
- Level: To ensure the new window is straight.
Choosing the Right Materials
Selecting the right materials is crucial for a successful installation. Here are some key materials to consider:
- Vinyl window: Choose a high-quality vinyl window that fits your opening.
- Insulation foam: Helps to keep your home energy-efficient.
- Caulk: For sealing gaps and preventing air leaks.
Safety Gear and Precautions
Safety should always come first. Make sure to wear:
- Safety goggles: To protect your eyes from debris.
- Gloves: To keep your hands safe while handling tools and materials.
- Dust mask: To avoid inhaling dust and particles.
Remember, preparation is key to a smooth window replacement process. Having the right tools and materials ready will save you time and effort during the installation.
Preparing for the Replacement
Before you start replacing your vinyl window, it’s important to get everything ready. This will help make the process smoother and more efficient. Here are the key steps to follow:
Measuring the Window Opening
- Measure the width and height of the window opening accurately.
- Check for any irregularities in the frame.
- Make sure to measure at multiple points to ensure accuracy.
Removing the Old Window
- Carefully take out the old window to avoid damaging the frame.
- Use a pry bar to help remove any trim or molding.
- Dispose of the old window properly.
Inspecting the Window Frame
- Look for any signs of damage or rot in the frame.
- Ensure that the frame is level and square.
- If you find any issues, fix them before installing the new window.
Preparation is key! Taking the time to measure and inspect will save you headaches later on.
By following these steps, you’ll be well on your way to a successful window replacement. Don’t forget to consider adding a security lock like the banditbar security lock for extra safety!
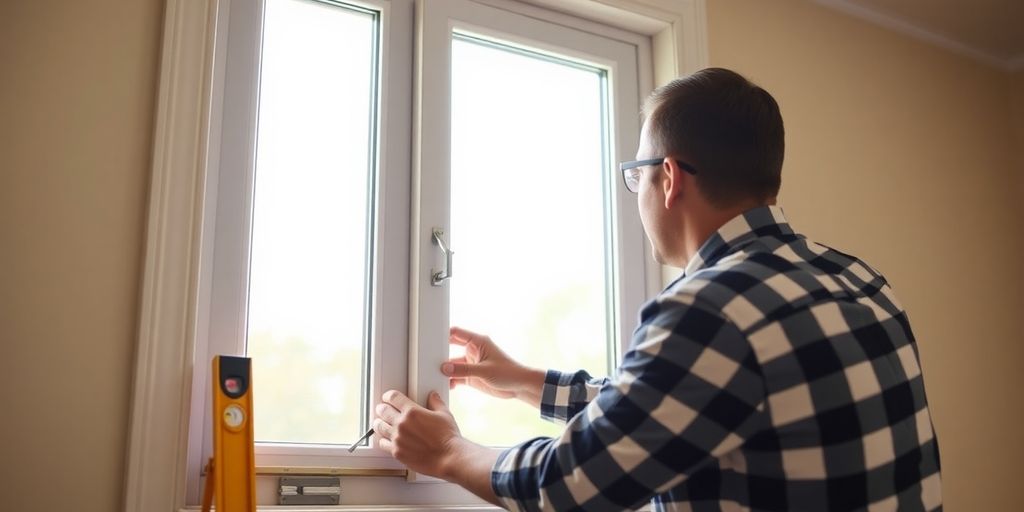
Step-by-Step Replacement Process
Installing the New Window
To start, carefully place the new window into the opening. Make sure it fits snugly and is level. Use shims to adjust the window if necessary. Once it’s in place, secure it with screws.
Sealing and Insulating the Window
After the window is installed, it’s important to seal it properly. Apply caulk around the edges to prevent air leaks. You can also add insulation to improve energy efficiency. This step is crucial for keeping your home comfortable and reducing energy bills.
Ensuring Proper Alignment
Finally, check that the window is aligned correctly. Open and close it to make sure it operates smoothly. If it sticks or doesn’t close properly, you may need to make adjustments. A well-aligned window not only looks better but also functions better.
Remember, taking your time during installation can save you from future headaches.
Here’s a quick checklist to follow during the replacement process:
- Measure the window opening accurately.
- Use quality materials for sealing and insulation.
- Double-check alignment before securing everything in place.
By following these steps, you can ensure a successful window replacement that enhances your home’s appearance and efficiency.
Finishing Touches and Maintenance

Cleaning the New Window
After installing your new vinyl window, it’s important to keep it clean. Here are some tips:
- Use a soft cloth or sponge to avoid scratches.
- Mild soap and water work best for cleaning.
- Avoid harsh chemicals that can damage the vinyl.
Regular Maintenance Tips
To ensure your window lasts a long time, follow these maintenance tips:
- Check the seals regularly for any gaps or wear.
- Lubricate moving parts, like locks and hinges, to keep them working smoothly.
- Inspect the frame for any signs of damage or rot.
Troubleshooting Common Problems
If you notice issues with your window, here are some common problems and solutions:
- Drafts: Check for gaps in the seals and reseal if necessary.
- Condensation: This can indicate poor insulation; consider adding more insulation.
- Difficulty opening or closing: Lubricate the tracks and check for obstructions.
Keeping your vinyl windows in good shape is essential for energy efficiency and comfort. Regular checks can save you money in the long run.
For those looking for reliable parts, consider the Caldwell Series 150 Spirex heavy-duty spiral window balance, available for €19.95. This product is designed to enhance the functionality of your windows and ensure they operate smoothly.
Cost Considerations and Budgeting
Estimating Replacement Costs
When planning to replace your vinyl windows, it’s important to understand the costs involved. Here’s a breakdown of what you might expect:
| Item | Estimated Cost Range |
|---|---|
| Vinyl Windows | $300 - $800 each |
| Installation Labor | $100 - $200 per window |
| Additional Materials | $50 - $150 |
Keep in mind that prices can vary based on size and style.
Budget-Friendly Tips
To save money while replacing your windows, consider these tips:
- Shop around for the best prices on materials.
- Look for discounts or sales at local home improvement stores.
- Consider doing some of the work yourself to cut down on labor costs.
Understanding Warranty Options
Warranties can help protect your investment. Here are some key points to consider:
- Check if the windows come with a manufacturer’s warranty.
- Understand what the warranty covers, such as defects or installation issues.
- Keep all receipts and documents for warranty claims.
Planning your budget carefully can help you avoid unexpected expenses and ensure a smooth window replacement process.
In summary, being aware of the costs and having a solid budget plan will make your window replacement project much easier and more successful. Don't forget to consider the wrs amesbury block & tackle balances for non-tilt windows - 47" 9-35 lbs as a cost-effective solution for your window needs!
Hiring a Professional vs. DIY
Pros and Cons of DIY Replacement
When considering whether to replace your vinyl windows yourself or hire a professional, it’s important to weigh the advantages and disadvantages of each option. Here are some key points:
- Cost Savings: Doing it yourself can save you money on labor costs.
- Skill Level: If you have experience with home repairs, you might feel confident tackling the project.
- Time Commitment: DIY projects can take longer than expected, especially if you run into problems.
When to Hire a Professional
Sometimes, hiring a professional is the best choice. Here are situations where you might want to consider this:
- Lack of Experience: If you’ve never done a window replacement before, it might be best to get help.
- Complex Installations: Some windows, like the wrs roto right hand sill-mounted casement, require special skills and tools.
- Time Constraints: If you’re busy, a professional can get the job done faster.
Questions to Ask a Window Installer
If you decide to hire a professional, make sure to ask the right questions:
- What is your experience with vinyl window replacements?
- Can you provide references from previous clients?
- What warranties do you offer on your work?
Choosing between DIY and hiring a professional can be tough. Evaluate your skills and the complexity of the job before making a decision.
In summary, whether you choose to go the DIY route or hire a professional, understanding the pros and cons will help you make the best choice for your vinyl window replacement project.
Conclusion
Replacing a vinyl window may seem tough at first, but with the right tools and steps, you can do it like a pro. Remember to measure carefully, follow the instructions, and take your time. If you run into problems, don’t hesitate to ask for help or look for videos online. Soon, you’ll have a new window that not only looks great but also keeps your home cozy and energy-efficient. So grab your tools and get started on your window replacement project!
Frequently Asked Questions
What are vinyl windows made of?
Vinyl windows are made from a type of plastic called polyvinyl chloride (PVC). This material is strong, durable, and helps keep your home energy-efficient.
How long do vinyl windows last?
Vinyl windows can last for a long time, usually around 20 to 40 years, depending on how well they are taken care of and the quality of the windows.
Can I install vinyl windows myself?
Yes, you can install vinyl windows on your own if you have the right tools and follow the steps carefully. However, it can be tricky, so make sure you're ready for the task.
Do vinyl windows need a lot of maintenance?
Not really! Vinyl windows are easy to take care of. You just need to clean them occasionally with soap and water to keep them looking nice.
Are vinyl windows energy-efficient?
Yes, vinyl windows are known for being energy-efficient. They help keep the heat inside during winter and the cool air inside during summer, which can save you money on energy bills.
What should I do if my vinyl window gets damaged?
If your vinyl window gets damaged, you may be able to replace just the broken part. If it's a big problem, consider getting a professional to help you fix or replace the window.