Ultimate Guide: How to Replace Shower Door Bottom Seal for a Leak-Free Bathroom
Ever notice water sneaking out from under your shower door? It's probably time to swap out that bottom seal. This guide will walk you through the whole process of replacing it, so you can keep your bathroom dry and tidy. No need for a pro—just a few tools, a new seal, and a bit of patience, and you'll have it done in no time. Let's dive into the details and get your shower leak-free.
Key Takeaways
- Understand why a bottom seal is crucial for keeping water in the shower.
- Gather the right tools and replacement seal before starting the job.
- Follow each step carefully to remove the old seal and install the new one.
- Check for leaks after installing the new seal to ensure it's working properly.
- Regular maintenance can extend the life of your new seal.
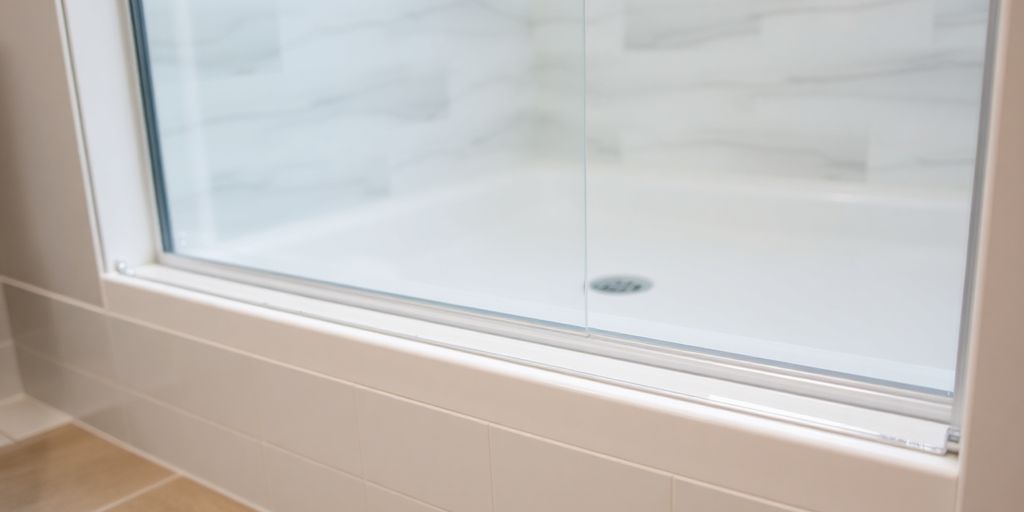
Understanding the Importance of a Shower Door Bottom Seal

Why You Need a Bottom Seal
You might not think much about it, but the shower door bottom seal is a silent hero in your bathroom. Without it, water would escape every time you shower, turning your bathroom into a slip-and-slide disaster. This seal acts as a barrier, keeping water where it belongs—inside the shower.
Common Issues with Worn-Out Seals
As time passes, seals can wear out, leading to a few annoying problems:
- Cracking: Old seals might crack, letting water leak out.
- Mold Growth: Moisture can get trapped, causing mold to grow on and around the seal.
- Misalignment: Worn seals might not sit right, increasing the chance of water escaping.
Benefits of Replacing the Seal
Swapping out that tired, old seal for a new one can really make a difference:
- Improved Water Containment: New seals do a better job of keeping water inside the shower.
- Reduced Mold Growth: Fresh seals help minimize moisture buildup.
- Enhanced Aesthetics: A new seal can make your shower look tidier and more appealing.
Regularly checking and replacing your shower door bottom seal is a simple yet effective way to maintain your shower's functionality and appearance. By doing this, you can avoid unnecessary water damage and keep your bathroom safe and dry.
For those looking to maintain a bug-free environment, consider the WRS Black Vinyl Adjustable Press-In Bug Seal, which not only keeps pests at bay but also ensures a snug fit for various door types.
Tools and Materials Needed for Replacing the Bottom Seal
Essential Tools for the Job
Replacing the shower door bottom seal isn't rocket science, but having the right tools makes it way easier. Here's what you'll need:
- Craft knife or scissors: Essential for cutting the new seal to fit your shower door perfectly.
- Damp soapy cloth: Before you stick on the new seal, you gotta clean the glass. This cloth will do the trick.
- Measuring tape: You don't want to eyeball this. Get precise measurements for the new seal.
Choosing the Right Replacement Seal
Picking the right seal can feel like a chore, but it's crucial to get one that fits and lasts. Here's what to consider:
- Material: Go for durable stuff that can handle moisture. Vinyl is a popular choice.
- Size: Make sure the seal matches your shower door's dimensions. Measure twice, cut once!
- Type: Decide between lip or bumper seals based on your shower setup.
For example, the WRS 3/8" Clear Shower Door Seal is a great option. It's designed for 3/8" thick glass doors and can be cut to size for a custom fit.
Safety Precautions to Take
Safety first, folks. Before you jump into replacing that seal, keep these tips in mind:
- Wear gloves: Protect your hands from any sharp edges or tools.
- Use safety goggles: You don't want any debris flying into your eyes.
- Make sure the area is dry: Slips and falls aren't fun.
Taking the right precautions can make your DIY project not only safer but also more enjoyable. So, suit up and get ready to tackle that leaky shower door seal!
Step-by-Step Guide to Removing the Old Bottom Seal

Measuring the Old Seal
Before diving into the replacement process, grab a measuring tape and jot down the length and width of your existing seal. This ensures you get the right fit for your new seal. Accurate measurements are key to avoiding unnecessary trips back to the hardware store.
Removing the Old Seal
Getting rid of the old seal can be a bit tricky, but here's how you can do it:
- Examine how the seal is attached to your shower door.
- If it's nestled in a channel, gently pull it out.
- If it's wedged between the door and a drip rail, you'll need to unscrew it first.
For stubborn seals, a hairdryer can be handy. Warm it up slightly to loosen any adhesive, making removal easier.
Cleaning the Area
Once the old seal is out, it's time to clean up. Use a damp cloth to wipe away any leftover adhesive or grime. A clean surface is crucial for the new seal to stick properly. Make sure everything is dry before moving on to the next step.
A clean and dry surface ensures that your new seal will adhere properly and last longer, preventing future leaks.
Installing the New Shower Door Bottom Seal
Cutting the New Seal to Size
First things first, take your new bottom seal and line it up against the length of your shower door. You want to make sure it's a perfect match in length. Grab a pair of scissors and cut the seal to size. Precision is key here to avoid any leaks later on. A snug fit means less water escaping your shower.
Attaching the New Seal
Now that you've got the right size, it's time to attach the seal. Slide the new seal onto the bottom edge of the door. Make sure the deflector side is facing inside the shower to keep the water where it belongs. Press down firmly to secure it, and smooth out any bubbles or wrinkles that might appear.
Ensuring a Proper Fit
Once the seal is in place, check that it's aligned correctly. Open and close the shower door a few times to see if everything moves smoothly. If you notice any gaps or if the door isn't closing right, you might need to make some adjustments or trim the seal a bit more.
A well-fitted seal is essential for keeping your shower leak-free. It might take a bit of tweaking, but it's worth it for a dry bathroom floor!
Testing and Maintaining Your New Shower Door Bottom Seal
Testing for Leaks
Now that you've got your new seal in place, it's time to make sure it's doing its job. Turn on the shower and give it a good run. Watch the bottom of the door closely. If you spot any water sneaking out, don’t panic. Check if the seal is aligned properly and adjust it if needed. Sometimes, a little tweak is all it takes. If there's still a problem, you might need a different type of seal. The WRS 3/8" Clear Shower Door Seal could be a good option if you need something that fits snugly and looks clean.
Regular Cleaning Tips
Keeping your seal clean is pretty straightforward. Every week, grab a damp cloth with some mild soap and give the seal a wipe-down. Avoid those harsh cleaners—they can mess up the material. If you see any mold or mildew, take care of it right away. Regular cleaning not only keeps things looking nice but also helps the seal last longer.
Avoiding Common Mistakes
Here’s what you should steer clear of to keep your seal in top shape:
- Abrasive cleaners: They can scratch and damage the seal.
- Strong chemicals: These might break down the material over time.
- Excessive moisture: This can lead to mold growth, which nobody wants.
When to Replace Again
Even the best seals won’t last forever. Keep an eye out for cracks, tears, or any signs of wear. Typically, you should think about replacing your seal every 3-5 years. Regular checks can save you from unexpected leaks and keep your shower looking sharp.
Consistent upkeep of your shower door seal is a small effort that pays off big time. Regular maintenance not only extends the life of your seal but also keeps your bathroom leak-free and looking great.
Signs Your Shower Door Bottom Seal Needs Replacing
Water Leaks
If you find water puddles outside your shower or notice damp spots on your bathroom floor, it's a clear sign that the bottom seal is not doing its job. A faulty seal can lead to water escaping, which not only creates a mess but can also damage your flooring over time.
Visible Wear and Tear
Take a close look at your shower door bottom seal. If you see cracks, splits, or parts that have come loose, it's time for a replacement. These visible signs of wear mean the seal is no longer effective in keeping water contained.
Mold Growth
Spotting mold or mildew around the base of your shower door? This is a red flag that water is seeping through a compromised seal, creating a damp environment perfect for mold to thrive. Mold not only looks bad but can also affect your health if not addressed.
Ignoring these signs can lead to bigger problems down the line, like costly repairs or health issues from mold exposure. Regular inspection and timely replacement of the seal can save you a lot of trouble.
Consider using a durable replacement like the beige top jamb weatherstripping, which is designed for efficiency and easy installation, much like the seals used in Marvin Elevate windows to prevent air leaks.
Troubleshooting Common Problems with Shower Door Seals
Seal Doesn't Fit Properly
Ever had a seal that just won't fit? It's a common headache. Double-check those measurements before buying a new seal. If it's too long, grab some scissors or a craft knife and trim it down. Make sure it lines up nicely before you stick it on. If it's still not working, you might have to adjust the door or the seal's position.
Seal is Leaking
Leaky seals are frustrating, right? First, take a close look at the installation. Is the seal sitting right? Any gaps? You might need to use some double-sided glazing tape for a tighter hold. It's like giving your seal a little extra hug to keep the water where it belongs.
Seal is Damaged Quickly
If your seal's falling apart too soon, something's up. Could be how it was installed—too much stress can wear it out fast. Or maybe you're using harsh cleaners that are eating away at it. Stick to mild soap and water, and keep an eye on moisture levels to avoid mold.
Conclusion
So there you have it, swapping out that old shower door bottom seal isn't rocket science. With a bit of patience and the right tools, you can tackle this DIY project and keep your bathroom dry. No more puddles or slippery floors to worry about. Just follow the steps, give the seal some time to settle, and you're good to go. Plus, you'll save a few bucks by not calling in a pro. Keep an eye on the seal over time, and with regular cleaning, it should last you a good while. Happy showering!
Frequently Asked Questions
What is the purpose of a shower door bottom seal?
A shower door bottom seal is a strip that goes along the bottom of the shower door to prevent water from leaking out and keep your bathroom floor dry.
How often should I replace my shower door bottom seal?
It's a good idea to check your shower door bottom seal every 1-2 years and replace it if you notice any cracks, tears, or if it looks dirty.
What tools are needed to change the shower door bottom seal?
You'll need some basic tools like scissors, a measuring tape, a damp cloth, and maybe a hairdryer to help remove the old seal.
Can I use any seal for my shower door?
It's best to use a seal specifically designed for shower doors. Look for one that is waterproof and flexible to fit properly.
How long should I wait for the new seal to dry?
After installing the new seal, you should wait about 24 hours before using the shower to ensure it sets properly.
Is replacing the shower door bottom seal difficult?
No, replacing the shower door bottom seal is a simple task that most people can do themselves with the right tools and instructions.